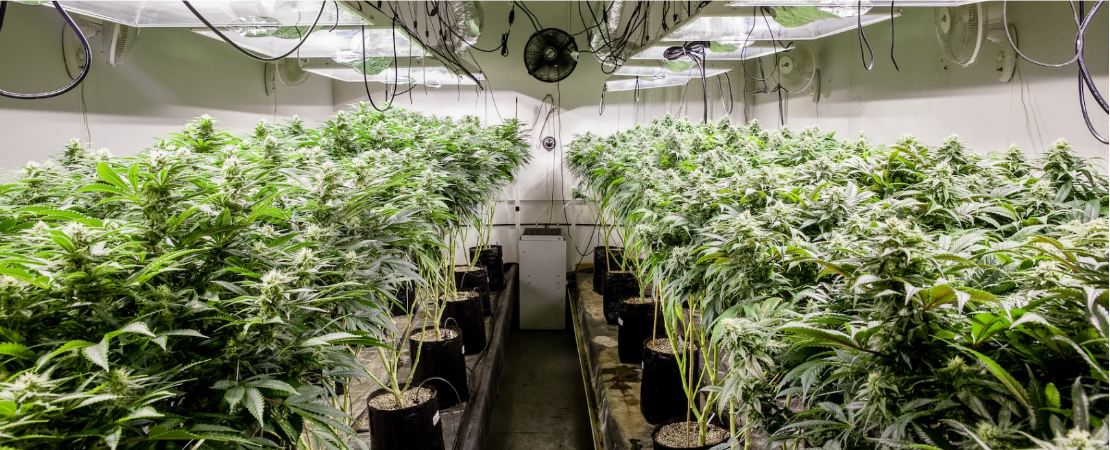
The Ultimate Guide to Curing Cannabis in a Commercial Grow Operation

In this article, we take a closer look at curing cannabis to discover all the process that goes into it, including the initial drying stage. 

How a Commercial Grow Operation Cures Cannabis for the Best Results 

Optimizing your cannabis grow operation doesn’t just stop at installing a state-of-the-art cannabis indoor grow system.

After exponentially increasing your cannabis harvest thanks to vertical growing racks, properly drying and curing cannabis will lead to a superior cannabis product that will pull you ahead of the competition.

When cannabis is properly dried and cured, the process leads to an accentuation of flavors thanks to the preservation of terpenes and cannabinoids. 

That’s not all. Drying and curing cannabis will also lead to a generally improved smoking experience thanks to the eliminated chlorophyll, which makes buds burn unevenly and taste too green.

But before getting into the meat and bones of drying and curing cannabis, it’s great to clear out confusing terms immediately.

Though curing cannabis and drying cannabis are used interchangeably by cannabis growers of all levels, they refer to very distinct processes.

After cannabis has undergone a drying process to remove most of its moisture, it then undergoes a curing process to help it stay fresh for longer while preserving its moisture, flavors, and potency.

In this article, we take a closer look at curing cannabis to discover all the process that goes into it, including the initial drying stage. 

We’ll dive into the step-by-step process of cannabis curing and highlight the temperature, humidity, and light requirements to cure cannabis correctly.
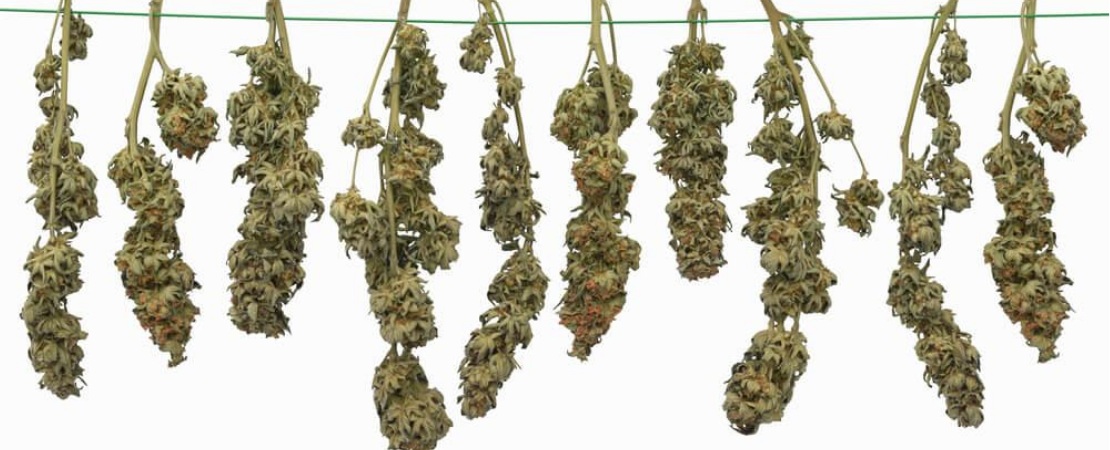
Drying cannabis involves removing about 75% of the plant's moisture content.

Drying Cannabis

Drying cannabis involves removing about 75% of the plant’s moisture content. The process consists of putting cannabis in an environmentally controlled room for about two to seven days.

Methods of Drying Cannabis

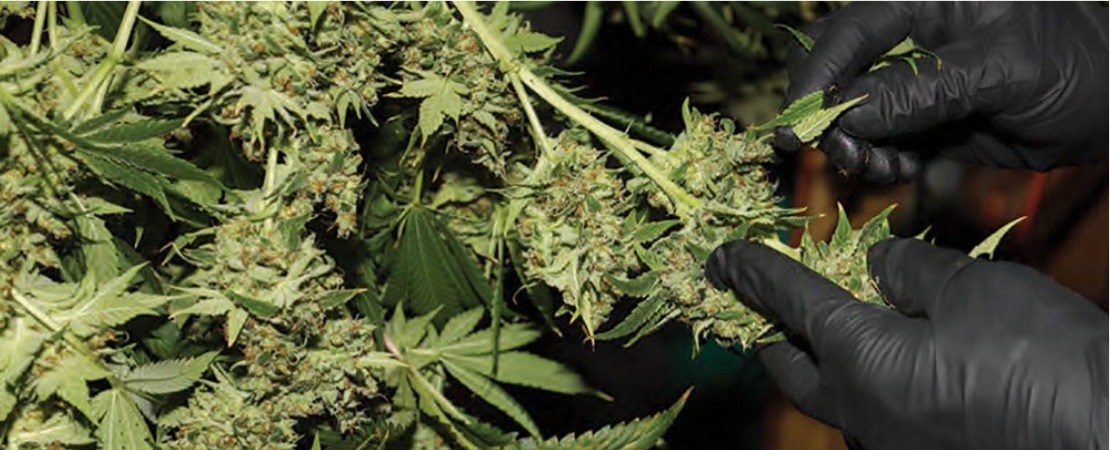
Before cannabis is dried, it undergoes an initial process that involves removing large fan leaves.

In your dry room, you can either choose to hang dry cannabis or spread it out on a flat rack. 
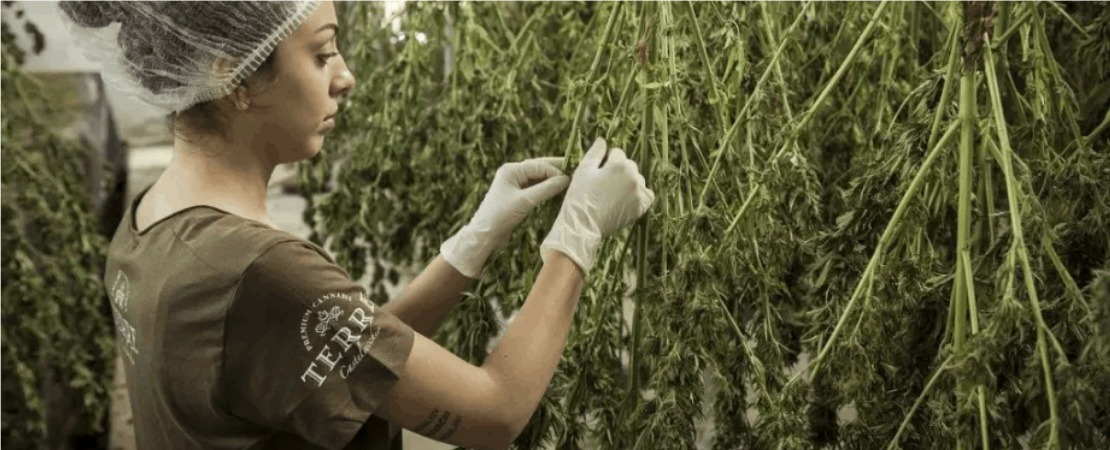
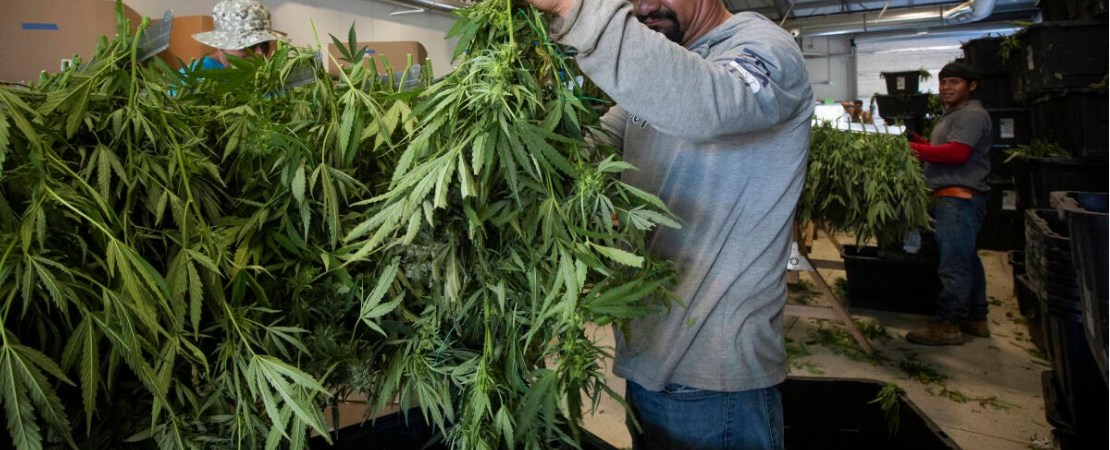
The hanging method involves hanging the whole cannabis plant or large branches on a line or hanger.

Hang Method

The hanging method involves hanging the whole cannabis plant or large branches on a line or hanger.

After two days, you can perform a dry test by bending a cannabis branch. A snap would mean the plant is adequately dry.

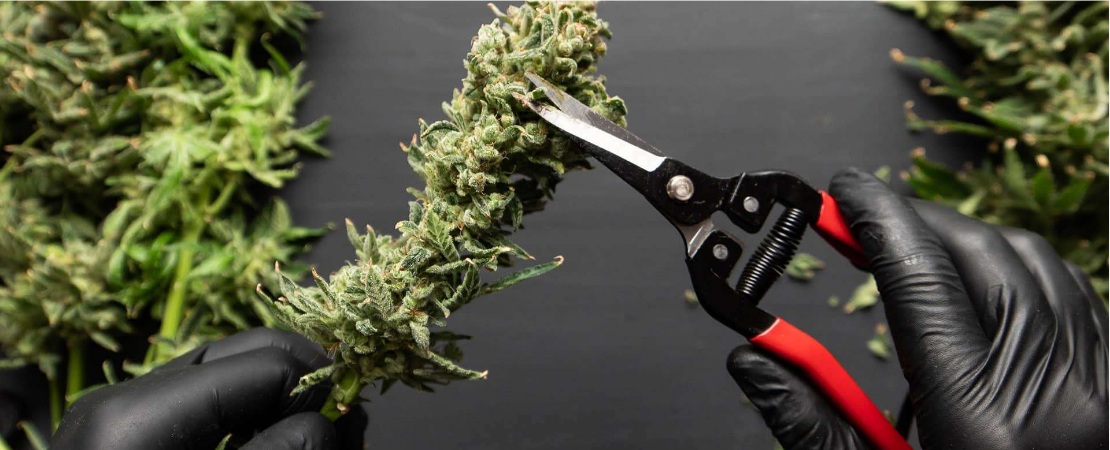
Once the cannabis is adequately dry, dry trimming separates unwanted plant material from the cannabis.

Some cannabis growers prefer the hang drying method as it prevents deformation and flattening of buds during the drying process.

It’s important to note that this method will mean your cannabis plant will take longer to dry due to the presence of more vegetative material.

Also, since the hanging method involves trimming the plant after it dries, it would mean more space is needed. 
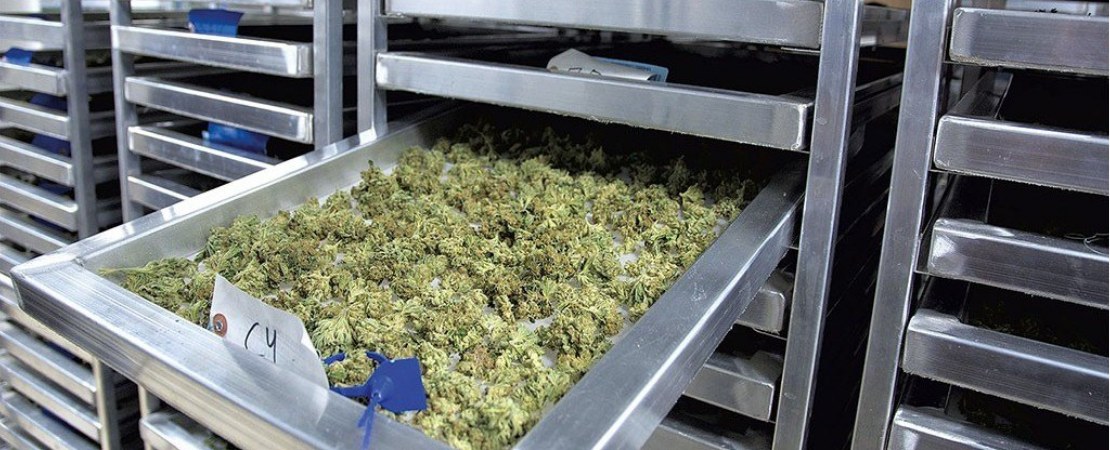
With many trimmed individual buds, the most convenient way to dry them would be on a flat rack.

Flat Rack Method

Choosing to wet-trim your buds will mean less plant matter, less drying space, and less drying time.

With many trimmed individual buds, the most convenient way to dry them would be on a flat rack.

Such racks are made of mesh, and they have multiple vertical layers. The mesh allows for excellent airflow, while the vertical layers will enable you to stack more trimmed buds and save up on space.

The dry test on the trimmed buds will be a bit different. After two or three days, gently squeeze the bud. If it’s too wet, it needs more time to dry.
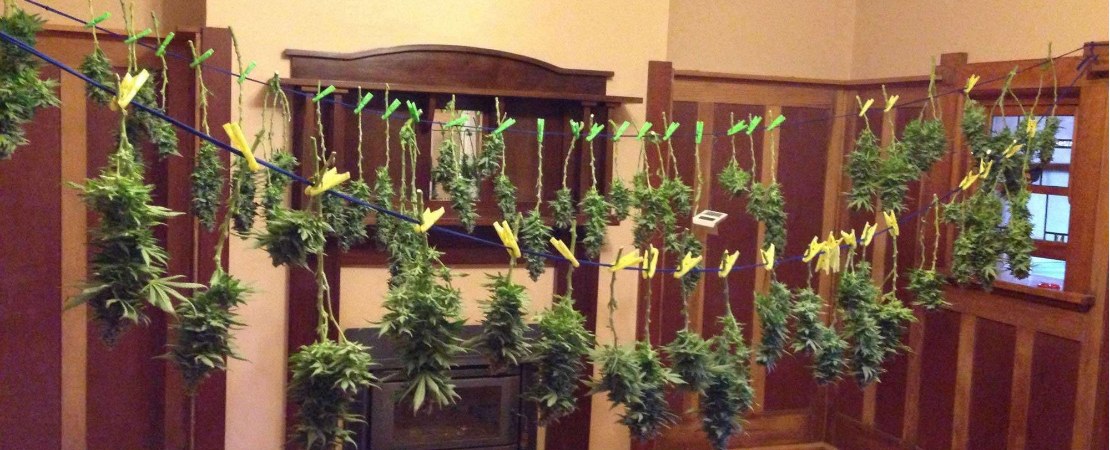
Whether you prefer to rack dry or hang dry your cannabis, you'll need to set the plant up in a room optimized for drying.

How to Set up a Drying Room for Perfectly Drying Cannabis

Whether you prefer to rack dry or hang dry your cannabis, you’ll need to set the plant up in a room optimized for drying.

For the best result, you’ll need to optimize the temperature, humidity, and light in the room.

It would be best to work with a small room exclusively dedicated to drying as it can be hard to control the humidity and temperature of a big room.

Cannabis Drying Room Equipment

  • Hygrometer to measure temperature and humidity
  • Fan
  • AC  (optional)
  • Dehumidifier (optional)
  • Tabletop caster units

Cannabis Drying Conditions

A good drying room will need a humidity range of 55-65% and a temperature range of 60-70°F. A hygrometer can come in handy to help you monitor both these values.

You can use a dehumidifier or an AC to lower humidity as needed.

A small fan at low speed is excellent for ensuring continuous air circulation.

To speed up the drying process, you can drop the humidity to 50% and increase the temperature to 75°F.

You can choose to have your drying room dark or use LEDs or green fluorescent lights for light requirements. UV light can degrade cannabinoids and terpenes in cannabis.

Moreover, with our tabletop caster units you can hang or flat dry your cannabis plants with ease. The vertical system gives you both mobility and added capacity to dry your plants.
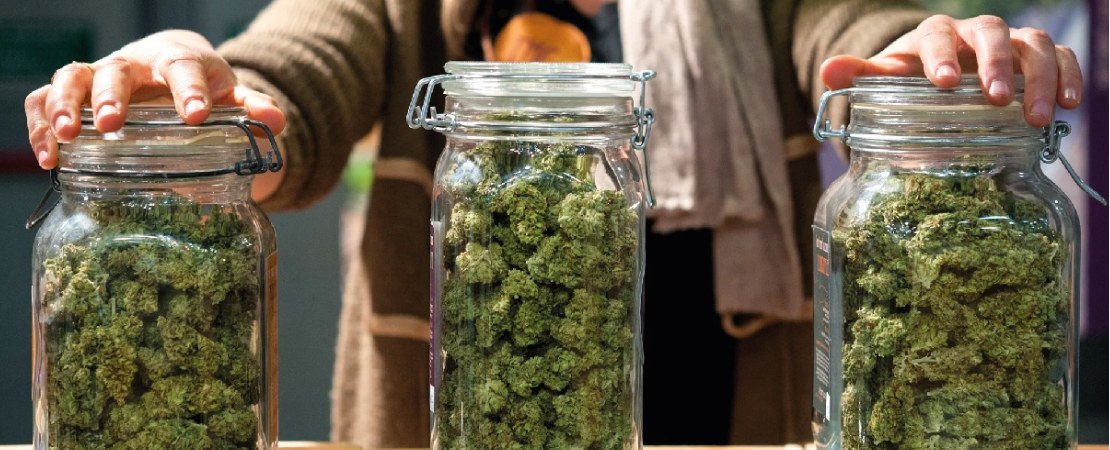
The curing cannabis process aims at redistributing and locking moisture throughout the bud to preserve aromatic flavors and potency.

Curing Cannabis

As mentioned earlier, the aim of drying is not to eliminate all the moisture content from cannabis.

After the initial drying process,  cannabis will appear dry outside but some moisture will still be retained within the bud.

The curing process aims at redistributing and locking moisture throughout the bud to preserve aromatic flavors and potency.

The process takes two weeks to one month and involves sealing cannabis in an airtight container at a humidity of 55 to 65% and temperatures of 64°F – 70°F.

Importance of Curing Weed

As cannabis cures, moisture continuously moves from the center to the outside of the buds. Also, chlorophyll continues to break down, removing the vegetable taste of cannabis.

Additionally, the process preserves the smell, flavor, and potency of the cannabis buds as Terpenes—which are aromatic compounds—are sensitive and quickly degrade if the proper curing measure is not taken.

Curing cannabis increases its life span exponentially, preventing molding, potency, and flavor loss.
Curing cannabis increases its life span exponentially, preventing molding, potency, and flavor loss.

Equipment You Need to Cure Cannabis

  • Airtight jars
  • Hygrometer
  • Humidification pods

Glass, ceramic, metal, and wood vessels are ideal. On the other hand, plastic bags and containers are unsuitable as they will affect the taste of the cannabis and allow in oxygen.

Ideally, each container needs a hygrometer to measure the ideal conditions. A humidification pod can come in handy to ensure that the perfect humidity is met in each container.

The Step-By-Step Process of Curing Cannabis
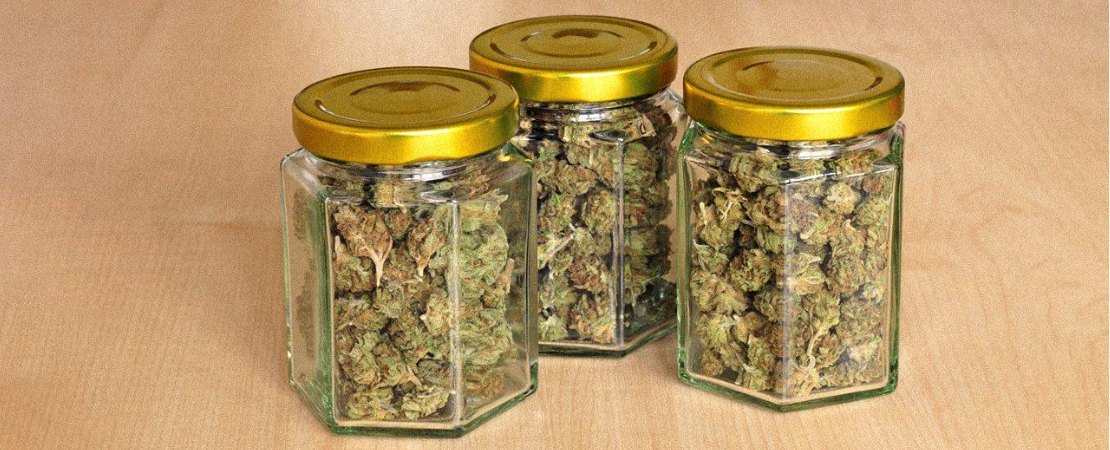
You must pack the buds loosely and avoid compacting the container to allow for proper airflow when needed.

Curing Cannabis Step 1: Pack Your Buds in an Airtight Container.

You must pack the buds loosely and avoid compacting the container to allow for proper airflow when needed.

The airtight container should then be stored in a cool dark place away from direct sunlight.

After two days, the buds will become soft as moisture rehydrates them.

If this doesn’t happen, it means you overdried your buds during the drying stage. To solve this, add a humidification pod to the container to add more moisture to the buds.

If the buds did not dry adequately and appear wet before the curing begins, leave the container lid open for 24 hours so the buds can dry up a bit.

Curing Cannabis Step 2: Burp Your Buds.

During the next week of the curing process, you’ll need to burp your buds once or twice daily. Burping involves opening the sealed cannabis container for a few minutes to allow oxygen and release moisture.

After the first week, you can reduce the frequency of burping to twice or thrice a week.

When burping, if you notice an unpleasant ammonia odor, it means bacteria are consuming the buds. This can lead to the rotting of the cannabis and mold formation. To avoid this, leave the lid open for 24 hours.
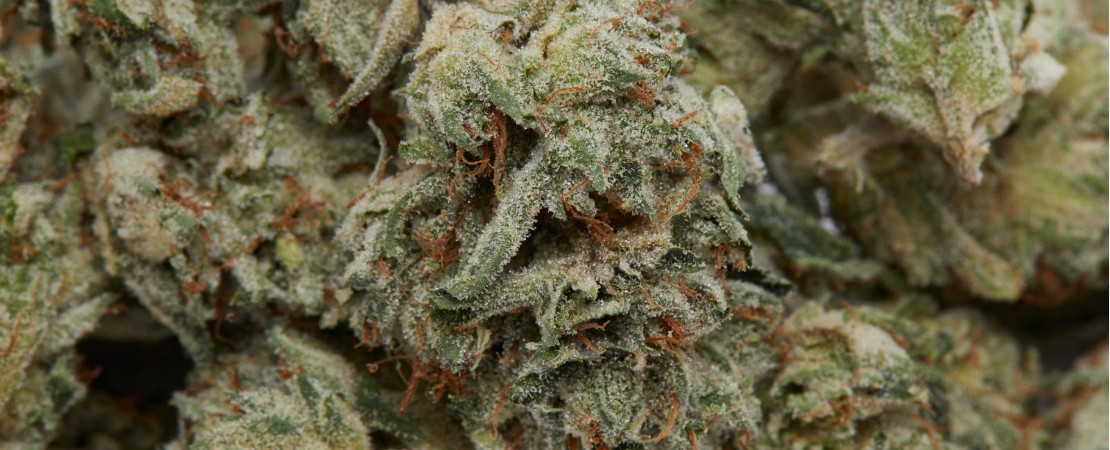
After two to four weeks, your cannabis should be appropriately cured to preserve all the flavors, potency, and aromas.

Curing Cannabis Step 3: Wait for the Buds to Cure

After two to four weeks, your cannabis should be appropriately cured to preserve all the flavors, potency, and aromas. Properly cured buds can stay optimal for up to two years if stored correctly.
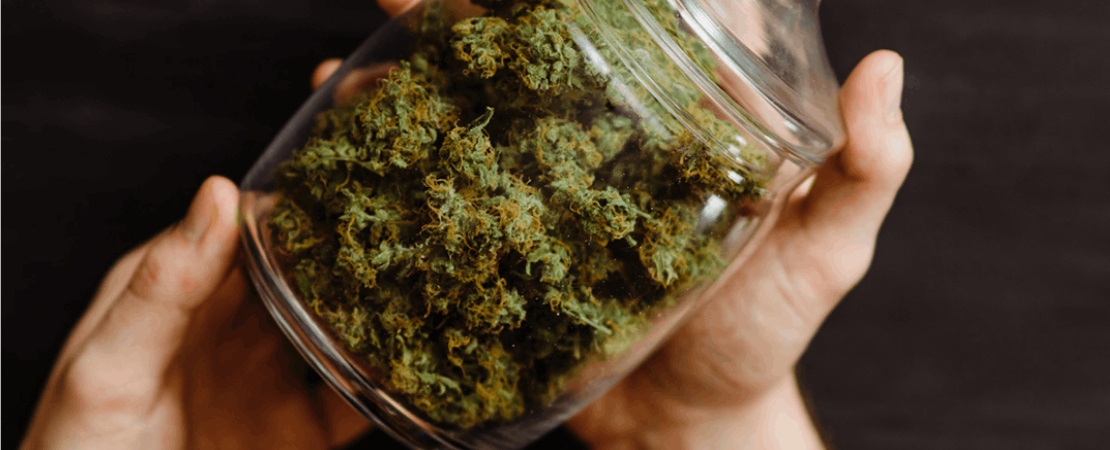
The ideal storage location for your cured buds should be a cool dark place free from moisture and oxygen.

Curing Cannabis Step 4: Properly Store Your Buds

The ideal storage location for your cured buds should be a cool dark place free from moisture and oxygen.

A vacuum-sealed glass jar should work fine. A hygrometer can help you monitor temperature and humidity, while a humidification pod can enable you to control humidity in the storage container.

Importance of Maintaining Optimal Conditions During Storage

  • Light

Even though short-term exposure to UV light won’t significantly affect the quality of your cannabis, long-term exposure will lead to the gradual degradation of cannabinoids and terpenes in the cannabis plant.

  • Humidity

The ideal humidity for storing cannabis is 55-65% relative humidity. Higher humidity levels will encourage the growth of mold and mildew, while lower humidity will lead to the degradation of essential plant materials.

  • Temperature

The high temperature will lead to the breakdown of a critical cannabinoid called THCA.

Continuous exposure to high temperatures will cause THCA to break down into THC and CBN. CBN is a non-psychoactive cannabinoid that can cause tiredness and headaches when smoked.
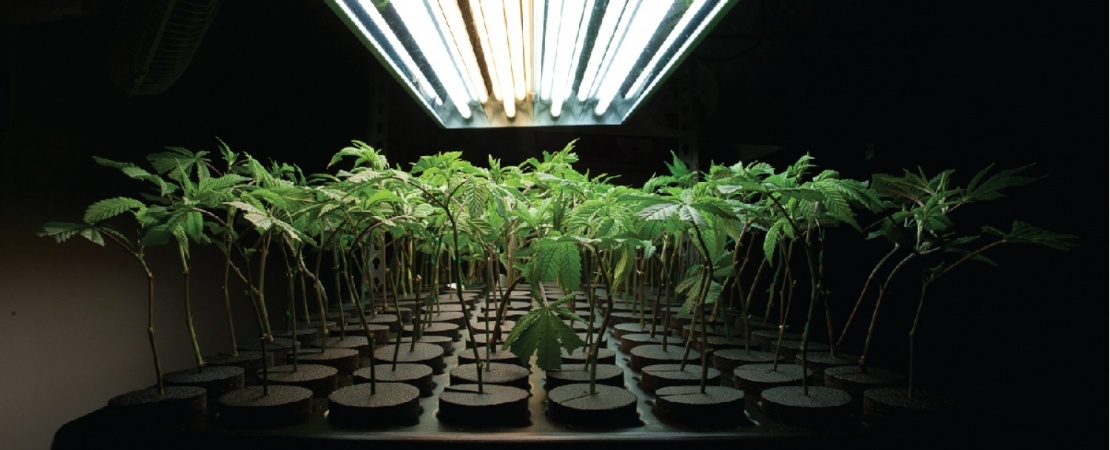
For a commercial cannabis farmer looking to expand your business and double or triple your income, an innovative solution like a cannabis vertical growing system will suit your business needs.

Elevate Your Commercial Grow Op Utilizing Indoor Growing Systems

For a commercial cannabis farmer looking to expand your business and double or triple your income, an innovative solution like a cannabis vertical growing system will suit your business needs.

At MMI Agriculture, we specialize in installing cannabis vertical grow systems such as our versatile vertical grow racks and mobile carriages. No matter your indoor space, we have a team of specialists who will customize floor plans to maximize your grow space.

We also have an installation team all over America to ensure your systems are fitted flawlessly and running smoothly. 

Both our labor and equipment come with a ten years warranty to guarantee reliable quality when you choose to work with us.

Want to learn more about our commercial indoor growing systems? Contact us today. 

A Step-By-Step Process on How to Clone Cannabis Plants

In this article, we'll dive into the step-by-step process of how to clone a cannabis plant & will discuss the benefits of cloning cannabis.

How To Clone A Cannabis Plant; The Cheat Sheet To Successful Cannabis Cloning

The demand for cannabis for research, medical, and recreational use has skyrocketed thanks to the ongoing legalization in different states.

Currently, the cannabis market is valued north of USD 15 Billion, with the number expected to compound annually at a rate of 14.9%.

With commercial cannabis growers scrambling to increase their yields to meet these growing demands, you can pull ahead of the competition by installing vertical grow racks.

Another way to stay ahead of the competition and cut weeks off your grow time is to clone your cannabis plants. Cloning your cannabis ensures only the most desired female plants with the ideal appearance, smell, and effects are propagated.

The alternative would be to buy feminized seeds, which can be expensive, especially for large-scale cannabis growers.

Another option would be to grow your cannabis from seeds. This is not ideal for a commercial grower as the seed will take longer, and your overall yield will be reduced thanks to poorly developed plants and sexing.

Sexing cannabis involves getting rid of male cannabis plants during the pre-flower stage to prevent fertilization of the female plants.

Since cannabis clones are a genetic replica of the mother plant, you’re assured of the quality and yield of the cloned plants.

In this article, we’ll dive into the step-by-step process of how to clone a cannabis plant. We’ll discuss the best time to clone cannabis plants and highlight the benefits of cloning cannabis.

Before getting into how to clone a cannabis plant, let's lay some groundwork and define a cannabis clone.

What Is a Cannabis Clone?

Before getting into how to clone a cannabis plant, let’s lay some groundwork and define a cannabis clone.

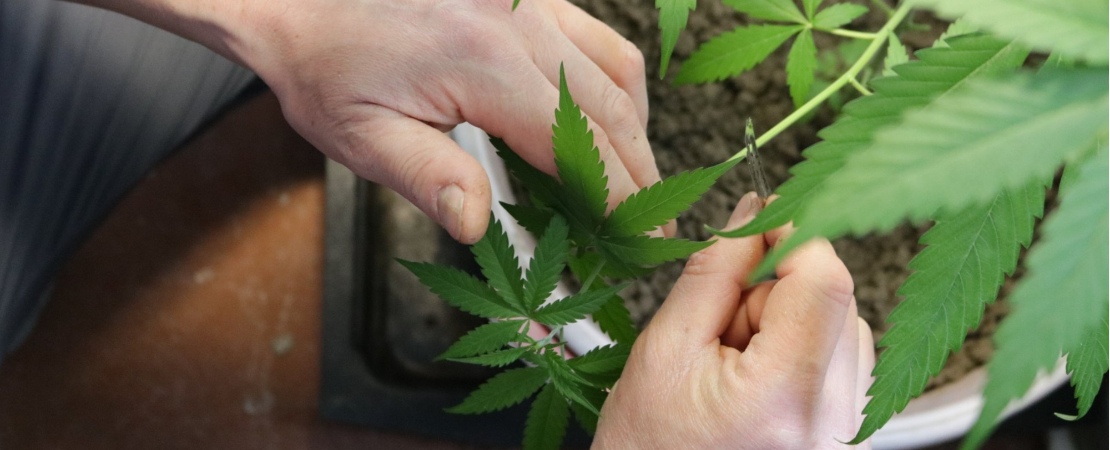
A cannabis clone is a branch or stems cut or snipped from a growing cannabis plant. Usually, this branch or stem cutting has the same genetic makeup as the mother plant from which it was cut. As a result, you’re guaranteed the same high-quality traits and yields you have come to expect from the mother plant.

A typical clone is about four to six inches. After snipping it from the mother plant, you can place it in a growing medium, let it develop root, then transfer it to the main growing area.

Cannabis clones usually require precise humidity and temperature conditions to develop roots and grow properly. For this reason, an indoor growing system may be the ideal setup to grow your cloned crops.

As you get to understand how to clone a cannabis plant you'll appreciate how cloning your cannabis from female plants will help cut back on your overhead costs. 

Benefits of Cloning Cannabis Plants for Indoor Cultivators

Cloning is an ideal practice for commercial growers because of its numerous benefits. For one, using cannabis clones instead of seeds can cut over a month from your growth period. Usually, seeds will need time to germinate, but once clones develop roots, they can continue to grow with vigor as a typical vegetative cannabis plant.

Another glaring benefit of propagating clones is that they provide security. Cannabis clones remove the guesswork from cannabis cultivation. Since clones are a genetic replica of the mother plant, you’ll know the yield, appearance, smell, and effects of your cannabis harvest.

You also won’t risk growing poorly developed seeds and male cannabis plants that will waste your valuable grow space.

As you get to understand how to clone a cannabis plant you’ll appreciate how cloning your cannabis from female plants will help cut back on your overhead costs. 

Cloning cannabis is a straightforward process requiring standard farming equipment you already own. With this step-by-step process of how to clone a cannabis plant, you’ll grow quality cannabis in no time.

While the details of how to clone a cannabis plant are fairly easy to master, it's also important to learn how to care for your clones, so they grow into well-nourished and disease-free cannabis plants.

A Step-By-Step Process of How to Clone Cannabis Plants

While the details of how to clone a cannabis plant are fairly easy to master, it’s also important to learn how to care for your clones, so they grow into well-nourished and disease-free cannabis plants.

Such care includes using sterilized cutting equipment, putting your clone in the right growing medium, providing the best condition, and providing the right hormones for the roots to develop.

What You Need to Clone a Cannabis Plant

  • Scissors: Ideal for cutting stems or branches off the mother plant
  • Razor: Ideal for trimming down the cuts
  • Rooting Setup (tray): To house the cuts as they develop roots
  • Rooting Hormone: To encourage root development

How to Clone a Cannabis Plant Step 1: Choose an Ideal Mother Plant

The ideal mother plant from which the clone is taken should be:

  • Female 
  • Healthy
  • Sturdy
  • At least four to six months old or two months into the vegetative cycle (this is the best time to clone cannabis plants)

Don’t take clones off a flowering plant, as you risk propagating hermaphrodite cannabis plants.

Next, you must carefully observe the plant to note the appropriate regions to make your cuts. The best place to make your cut is above the nodes so the plant can grow after the cuts.

How to Clone a Cannabis Plant Step 2: Cut the Right Branch From the Mother Plant

Next, you must carefully observe the plant to note the appropriate regions to make your cuts. The best place to make your cut is above the nodes so the plant can grow after the cuts.

Nodes are points of intersection where the branch and stem meet or where a sub-branch grows from a main branch.

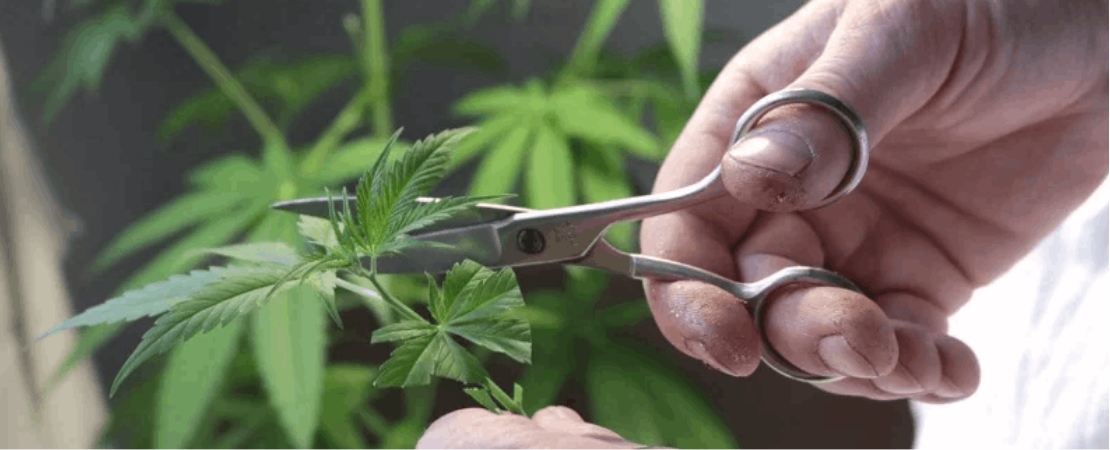
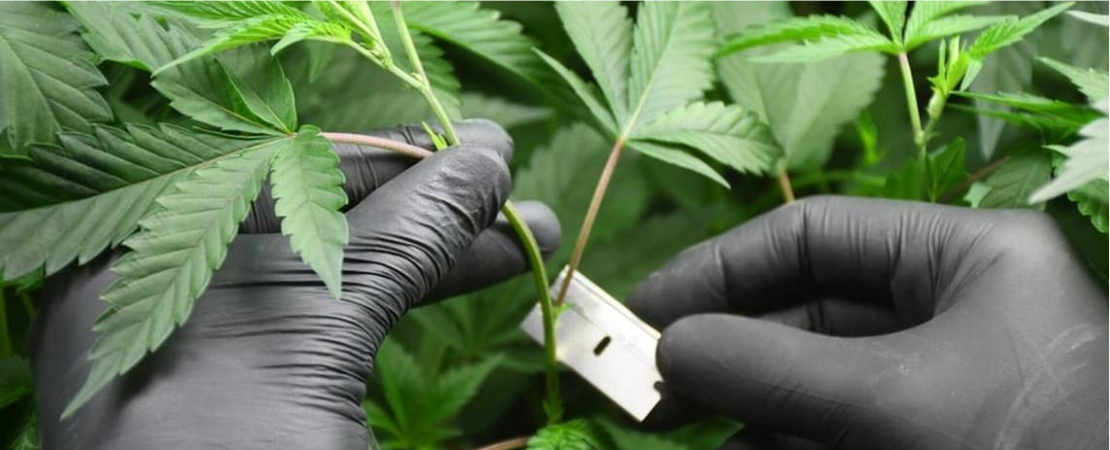
Pick a healthy long branch at least two nodes above the point you want to cut. You can use scissors to snip this branch off the main cannabis plant.

Then use a razor to cut below the bottom node at an angle of 45 degrees to increase the surface area for root formation. This is a crucial step in how to clone a cannabis plant for maximum growth success.

How to Clone a Cannabis Plant Step 3: Prepare the Cut (Clone) For Rooting

Immediately after cutting your clones, experts advise coating the cut region with a rooting hormone like aloe powder or cloneX gel. This will promote quick and healthy root formation.

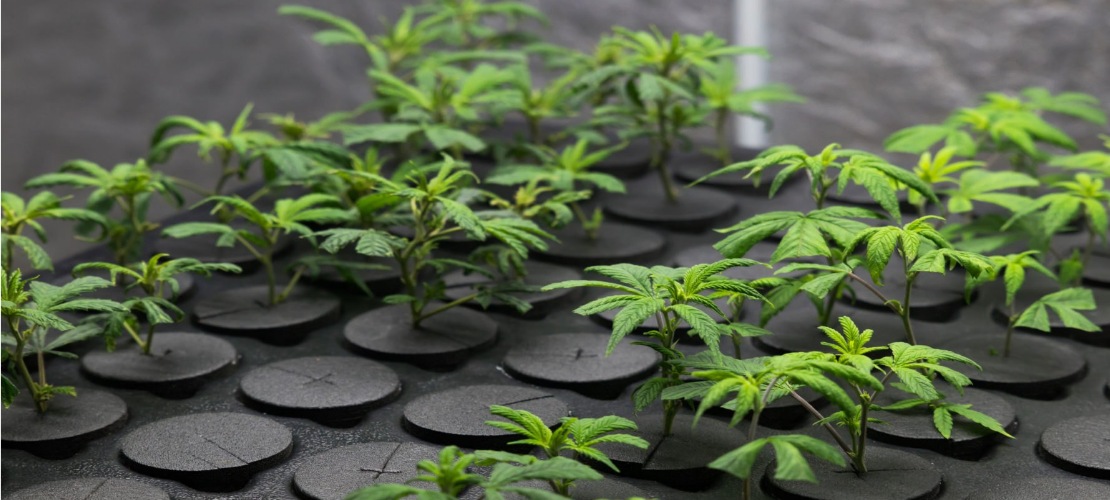
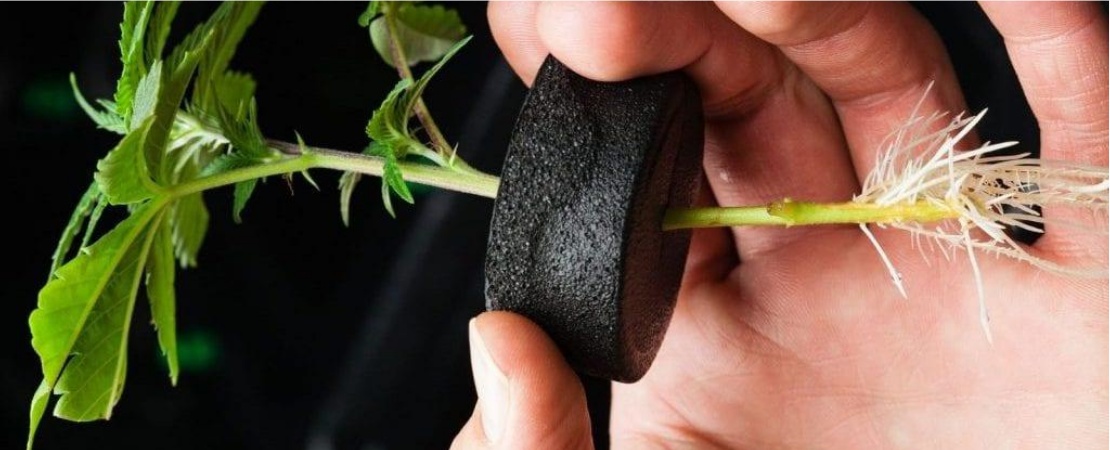
After this, you can put your clones in a rooting medium soaked in water and nutrients. Some effective rooting mediums include rooting cubes, Rockwool, peat moss, and foam.

Typically, the rooting medium will sit on a water-holding tray such as this one. The advantage of this grid drainage tray is it ensures each clone gets the appropriate amount of water and nutrients.

Once your clone is set up in the ideal growing medium, set the perfect conditions for it to thrive.

How to Clone a Cannabis Plant Step 4: Provide the Ideal Condition for Growth

Once your clone is set up in the ideal growing medium, set the perfect conditions for it to thrive. For the first two days, the clones will need humidity of 95 to 100 percent and then a subsequent humidity of 80 to 85 percent until the plants are ready for transplanting.

To further encourage the roots to shoot, warm temperatures of 24-27 °C are essential.

The clones will also need the right amount of light to grow properly. Natural light is too powerful and, therefore, not ideal. Artificial LED or T5 light for 18 to 24 hours a day will accelerate the growing speed of the roots.

For water requirements, you’ll need to gently spray water on the clone’s leaves and the growing medium until it’s moist, not soggy.

How to Clone a Cannabis Plant Step 5: Monitor and Care For Your Clones

If you notice dead clones, remove them from the healthy bunch to prevent the development and spread of mold. You can also respace the clones after removing dead ones to have more air circulating through the plants.

Some clones will root out quickly, while others will take longer to develop roots. From the third to the 14th day, you’ll notice thick white roots forming at the bottom of the grow medium. This is an indication that the clones are ready for transplanting.

How to Clone a Cannabis Plant Step 6: Transplant the Clones

During the initial stages, cloned cannabis plants usually require a lot of care as the plant is under stress after being separated from the donor plant. During this time, the plant is in a state of homeostasis as it tries to survive and develop its roots. 

But once the plant develops its roots, it can absorb moisture and nutrients. From here on out, the plant will thrive, and you’ll notice signs of top growth as the plant develops new vegetative material.

This indicates that the plant is ready to go to the main growing area. You’ll need to transplant clones into a growing medium of choice, whether Rockwool, Clay Pellets, Oasis Cubes, Starters, Rice Hulls, or Rockwool.

To avoid transplant shock, wear gloves when handling roots and keep the environment sterile.

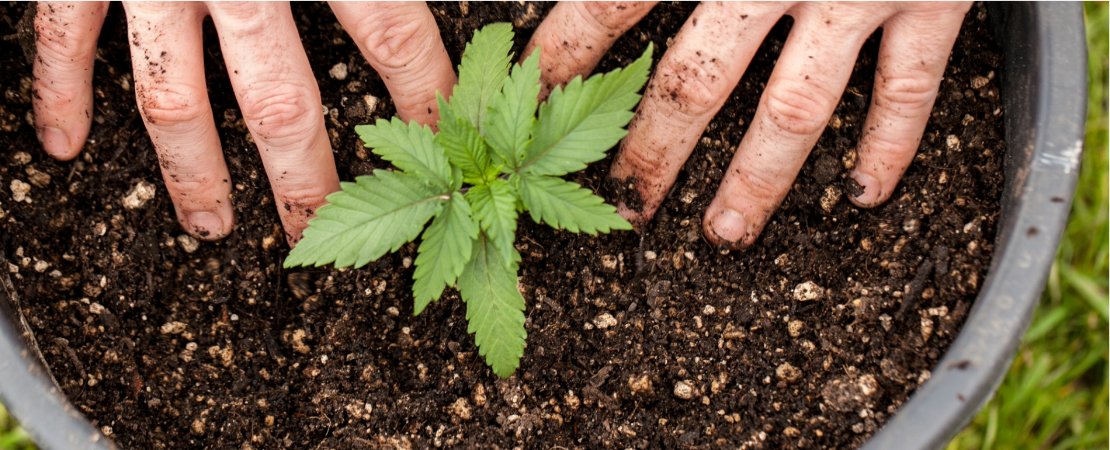
Here is the step-by-step transplant process on how to clone a cannabis plant;

  • Put your growing medium in your pot, or growing trays
  • Water the growing medium before placing the clone, so the medium doesn’t move around once you put the clone in it
  • Once the water has drained, burrow through the growing medium with your two fingers to create enough space for the clone.
  • Put the clone in the hole and gently pack the growing medium around it

The demand for cannabis is steadily rising. As more states on the east coast legalize the plant, the need for year-round production will only shoot.

Boost Your Cannabis Harvest With Our Vertical Growing Systems

The demand for cannabis is steadily rising. As more states on the east coast legalize the plant, the need for year-round production will only shoot.

Our indoor farming solutions can pair you with the best Vertical Grow Racks, and Mobile Carriages to ensure your indoor farming system is working at optimum capacity.

All our parts and labor carry a 10-year warranty. We also provide additional services including, free design and CAD services, to ensure that your customized racking design maximally utilizes your specific space for the highest return on investment.

Ready to get started on your new farming journey? Request a quote, or Contact us for more information about our innovative cannabis farming solutions.

Cannabis Plant Anatomy: Essential Parts That Make up a Cannabis Plant

This process focused on one part of the cannabis plant, it can be easy for growers to look all parts that make up the cannabis plant anatomy.

A Comprehensive Review On The Anatomy of a Cannabis Plant

As a commercial cannabis grower, one of the alluring benefits of installing an indoor vertical farming system is your direct contribution to reducing the overall carbon footprint.

As you utilize an indoor grow system in a pre-urban or urban area, you serendipitously reduce CO2 emission sourcing from the transportation of cannabis to urban populations.

Aside from that, you’ll enjoy a bountiful harvest all year round as your indoor grow system will allow you to adjust continuously for optimum conditions.

But optimum conditions aren’t the only secret source as far as getting a bountiful cannabis harvest goes. As a commercial cannabis grower, you’ve probably had your fill of the feminization of cannabis seeds.

Growing feminized (sinsemilla) cannabis ensures the plant focuses all its energy on producing resinous, rich, smokable buds free from seed.

With such an intricate process focused on only one part of the cannabis plant, it can be easy for growers to overlook all the other parts that make up the cannabis plant anatomy.

From buds to trichomes, nodes, leaves, and stems, down to the roots, all these parts play significant roles in the well-being of your cannabis plant. Damage to any of these parts could prove detrimental to your cannabis plants and affect your overall harvest.

This guide will detail all these essential components that make up the anatomy of the cannabis plant and give health check indicators.

We’ll also detail the different genders of cannabis plants to understand their commercial significance. Finally, we’ll give you a rundown of other benefits of our high-density mobile, vertical grow rack shelving systems for the vertical farming industry.

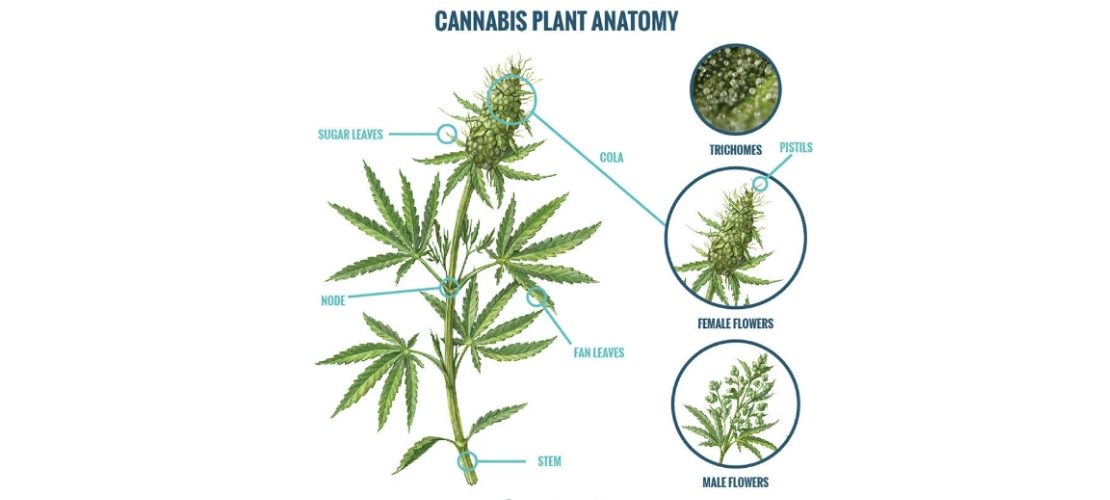
Cola (bud site) is a cluster of buds that grow tightly at the top of the marijuana plant.

Cannabis Plant Anatomy- The Cola

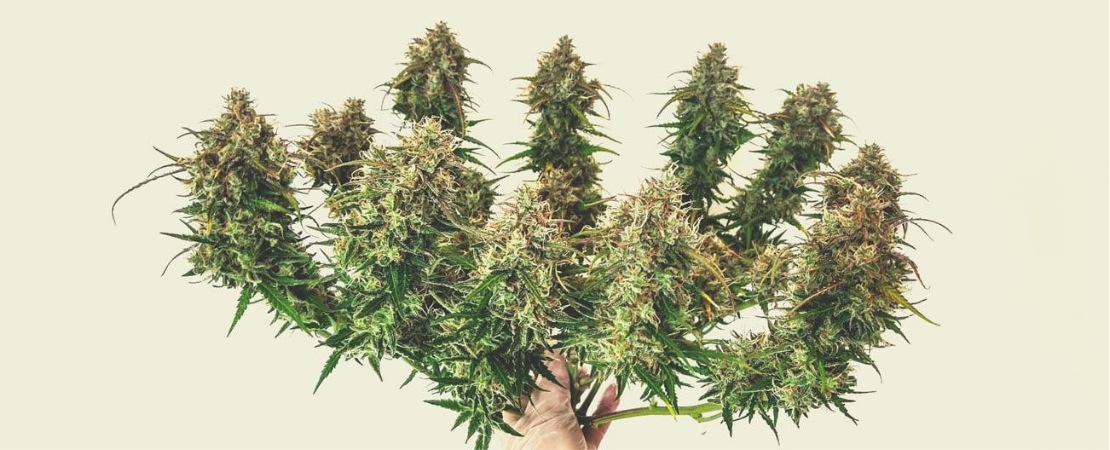
Cola (bud site) is a cluster of buds that grow tightly at the top of the marijuana plant. However, you can find cola through your cannabis plant, depending on how well you top your marijuana plant. The main cola that grows at the top of the cannabis plants is usually referred to as the apical bud.

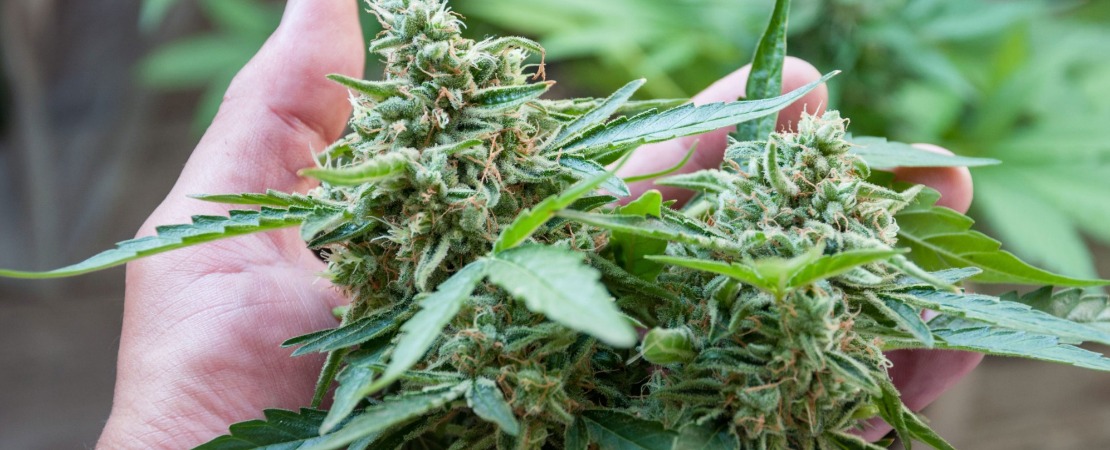
Better known as buds, these are the magnum opus that makes cultivating cannabis worthwhile. In cannabis plant anatomy, flowers are where the essential cannabis components —cannabinoids, and terpenes—are concentrated.

Cannabis Plant Anatomy – Flowers

Better known as buds, these are the magnum opus that makes cultivating cannabis worthwhile. In cannabis plant anatomy, flowers are where the essential cannabis components —cannabinoids, and terpenes—are concentrated.

These compounds make cannabis such a health and wellness powerhouse, aside from inducing the psychoactive effect making marijuana such a hit.

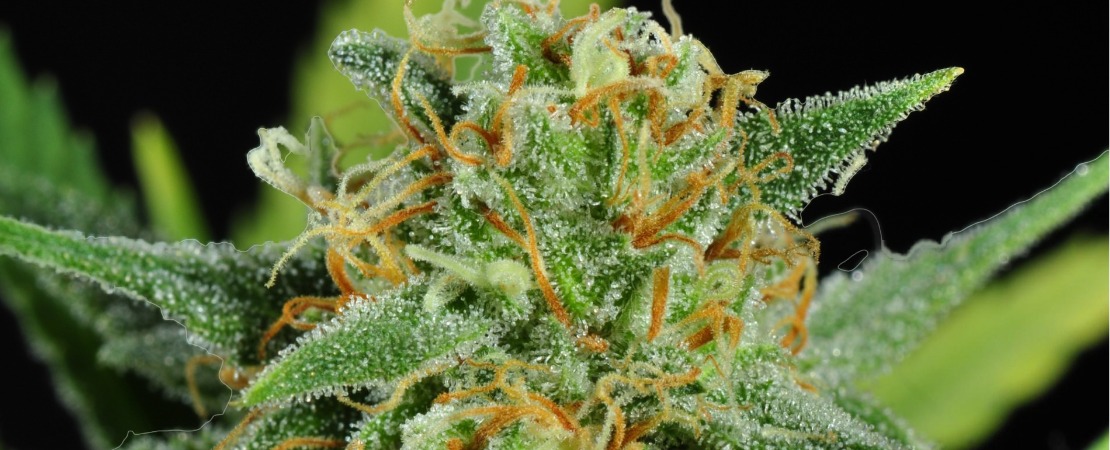
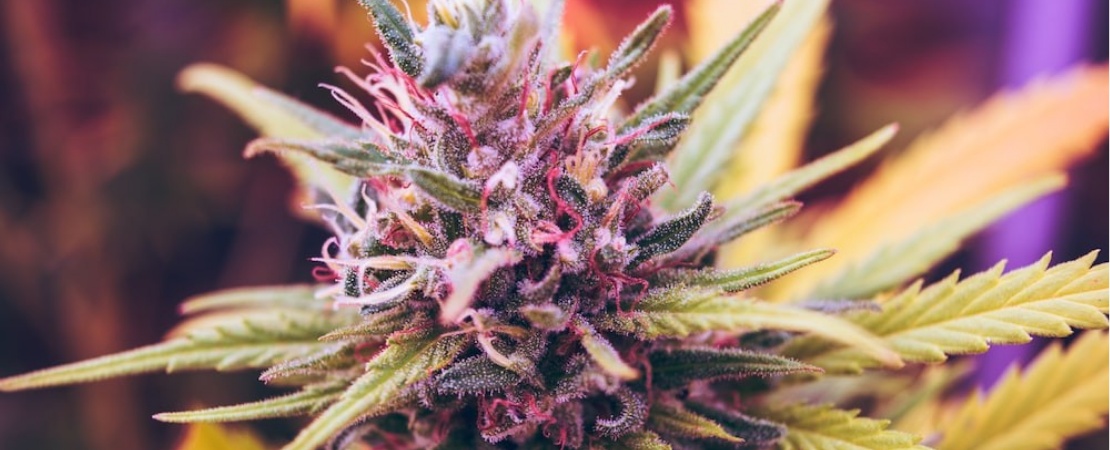
A healthy cannabis flower usually develops a deep orange pistil as the harvest time looms closer. Contrarily, unhealthy flowers take on a mushy gray color.

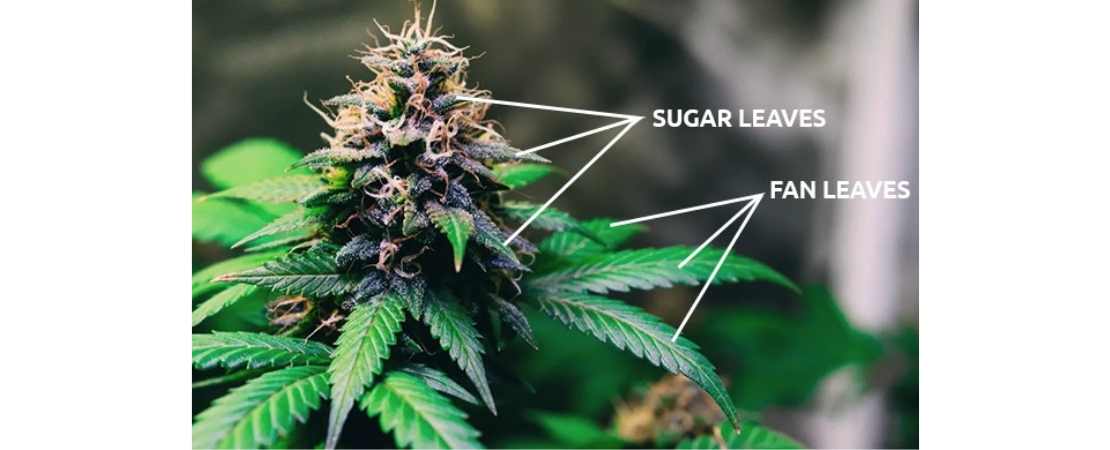
Between and around the cannabis flowers or buds, you'll spot small sprouting leaves covered in sugar-like crystals. These are what are known as sugar leaves.

Cannabis Plant Anatomy – Sugar Leaves

Between and around the cannabis flowers or buds, you’ll spot small sprouting leaves covered in sugar-like crystals. These are what are known as sugar leaves.

It won’t be easy to see the leaves from a distance, but as you take a closer look at your buds, you’ll be sure to spot them glittering like gems on display.
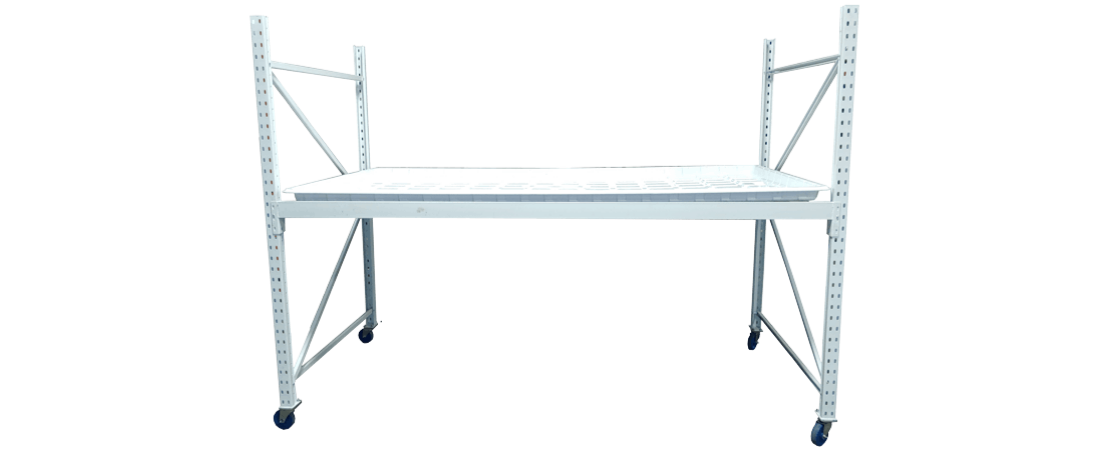
Sugar leaves, like buds, contain cannabinoids and terpenes. You could smoke them and get high, but they’ll irritate the throat as they produce more smoke than buds.

For this reason, sugar leaves are usually trimmed during harvesting and are used to make cannabis derivatives like concentrates and edibles.

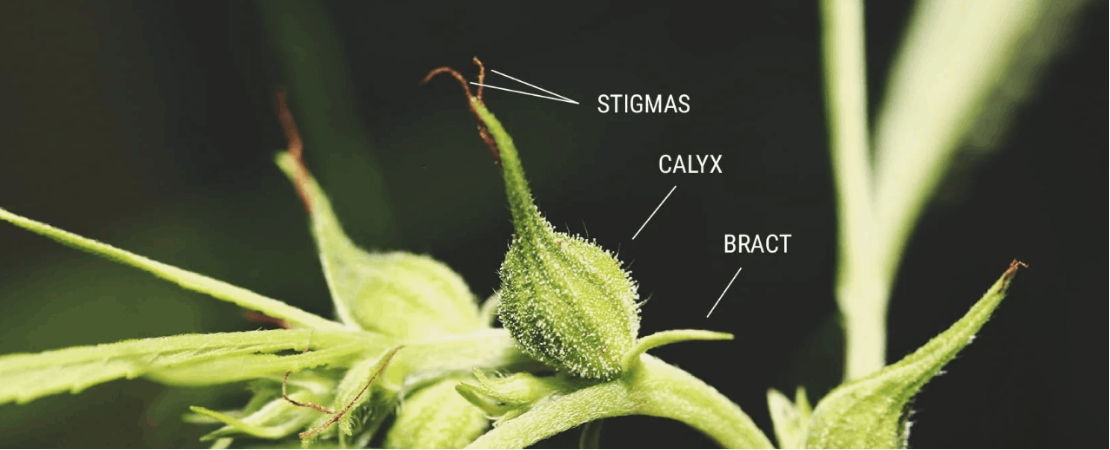
The cannabis female reproductive system is contained in the bract. The bracts are green tear-shaped leaves that are generously sprinkled with resin glands.

Cannabis Plant Anatomy – Bract and Calyx

The cannabis female reproductive system is contained in the bract. The bracts are green tear-shaped leaves that are generously sprinkled with resin glands.

For this reason, the highest concentration of cannabinoids and terpenes is found in these areas of the cannabis plant. Therefore, bract significantly impacts the potency of a cannabis plant.

On the other hand, the calyx is a translucent layer that forms at the base of the bract and is not visible to the naked eye.

Cannabis Plant Anatomy – Stigma and Pistil

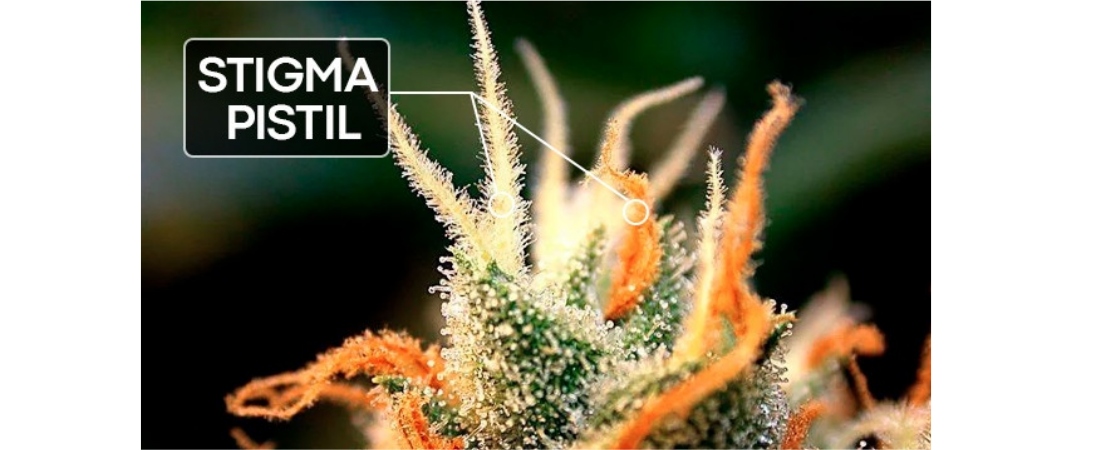
Cannabis flowers house the main reproductive component of the cannabis plant called the pistils. Pistils grow from one ovule that develops protruding vibrant hairlike structures called stigmas.

In non-sinsemilla cannabis plants, the stigma collects pollen from male cannabis plants to fertilize female cannabis plants and produce seeds.

Trichomes are the literal cream of the cannabis plant anatomy. You can see them throughout your cannabis buds.
Cannabis Plant Anatomy – Trichomes

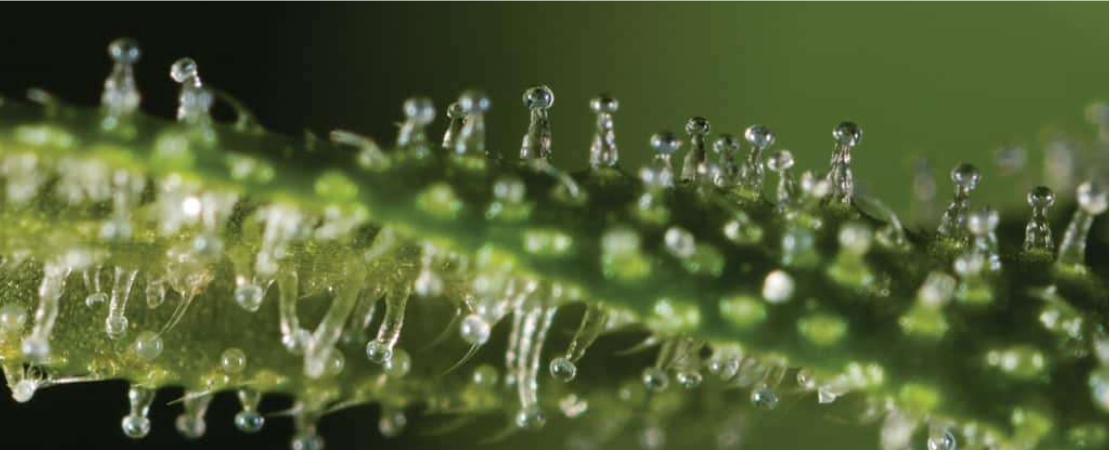
Trichomes are the literal cream of the cannabis plant anatomy. You can see them throughout your cannabis buds. They appear like a sticky, milky white resinous layer that covers the buds, calyxes, and sometimes stems of the cannabis plant.

Trichomes possess resin glands that produce aromatic oils called terpenes and cannabinoids such as THC and CBD.

Plants typically develop a resinous layer of trichomes to protect themselves from harsh environmental factors and predators.

However, scientific studies have revealed just how medically significant these plant self-defense compounds can be to humans.

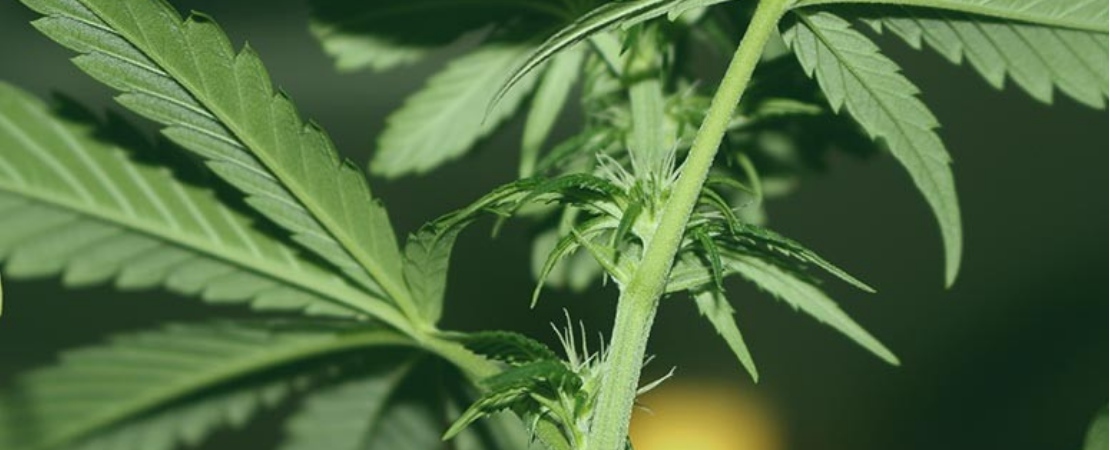
A node is a point of intersection from where a branch grows off the main stem, or a sub-branch grows off the main branch.

Cannabis Plant Anatomy – Node

A node is a point of intersection from where a branch grows off the main stem, or a sub-branch grows off the main branch.

Sometimes you can spot fan leaves, flowers, and buds growing directly on a node.

The internodal spacing is the space between nodes. This is usually a great indicator of how tall your cannabis plant will grow.

The male and female parts of the cannabis plant usually sprout from the nodes between the main stem and a branch. Usually, the male plants will develop round balls, which will grow into sacks, while the female plant will develop flowers with pistils.

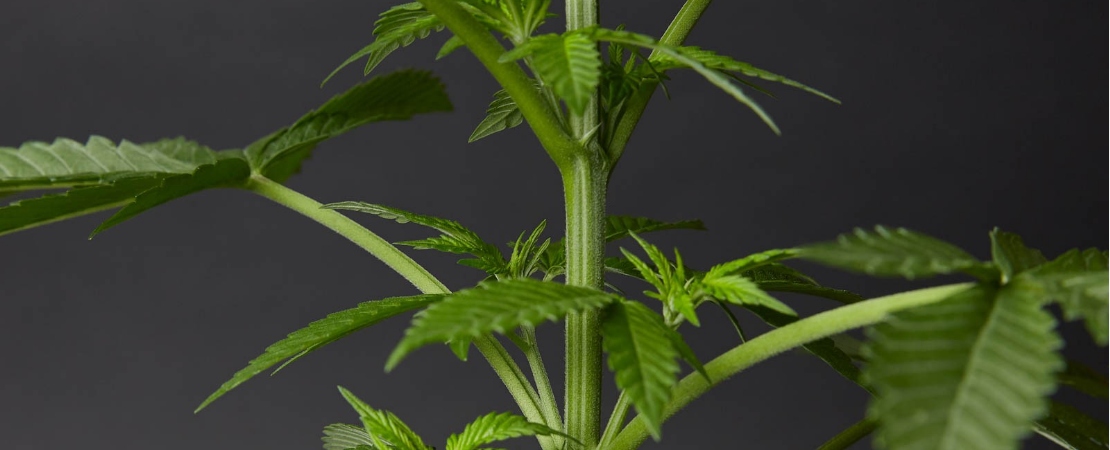
The stem is the literal and figurative backbone of the cannabis plant. From this structure, all other parts that form the cannabis plant anatomy grow.

Cannabis Plant Anatomy – Stem

The stem is the literal and figurative backbone of the cannabis plant. From this structure, all other parts that form the cannabis plant anatomy grow.

Also, the stem supports the distribution of fluids and nutrients throughout the cannabis plant.

Though stems don’t form the final cannabis product meant for consumption, they can be used to produce other cannabis products like hash and cannabutter or to create yarn and twine.

Fan leaves are large green leaves whose primary function is to generate food for the cannabis plant as a result of photosynthesis.

Cannabis Plant Anatomy – Fan Leaves

Did you know that the ubiquitous cannabis leaf symbol used to represent marijuana is actually a fan leaf?

Fan leaves are large green leaves whose primary function is to generate food for the cannabis plant as a result of photosynthesis.

Even though their use as a symbol for marijuana will have you believe they form the smokable part of cannabis, that couldn’t be further from the truth.

Fan leaves are discarded during cannabis harvest. They contain little to no cannabinoids and produce a lot of smoke, significantly irritating the throat.

Signs of Healthy Cannabis Leaves

  • Vibrant green leaf color. No discolored scars anywhere on the leaves
  • No drooping, curling, or wilting. The leaves are firm and stretch up toward the light source
  • An abundant number of leaves

Cannabis roots project towards the growing medium from the plant's central stalk. The primary root is called a tap root, from which lateral roots and root hairs grow.

Cannabis Plant Anatomy – Roots

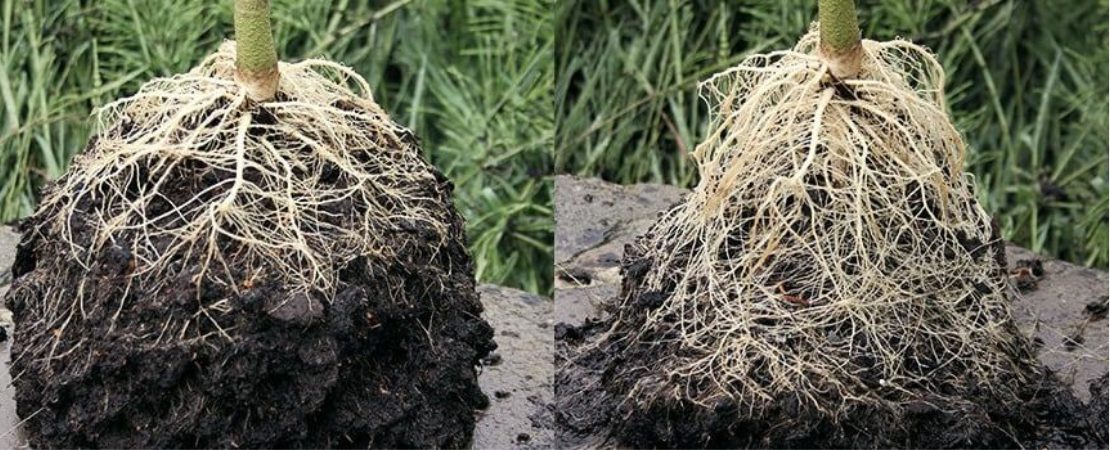
Cannabis roots project towards the growing medium from the plant’s central stalk. The primary root is called a tap root, from which lateral roots and root hairs grow.

The main task of the entire root system is to absorb water, oxygen, and nutrients so that the cannabis plant can grow healthy and strong.

Signs of Healthy Cannabis Roots

  • Appears white with little to no browning
  • No signs of mushiness or brown patches that would indicate root rot
  • No sign of tangle or rootbound

Cannabis Plant Anatomy – Female vs. Male Marijuana Plants

Cannabis is a dioecious plant. That’s to say female and male productive organs appear in different plants.

Unless you get specialized feminized seeds, it can be hard to tell whether a particular plant is male or female until it reaches maturity and begins to develop its reproductive organs.

You can usually spot these organs before they become functional during the pre-flower stage. When examining the notes, you’ll spot tiny sacs or round balls on the male cannabis plant and two brackets on a female cannabis plant.

During the flowering stage, the tiny sacs will develop pollen sacs to spread pollen, while the female plants will develop stigmas that catch pollen for fertilization.

Now that you know all the signs of a healthy cannabis plant, our hydroponic trays are the best flats for growing your cannabis.

The Significance of Growing Your Cannabis in Vertical Growing Systems

Now that you know all the signs of a healthy cannabis plant, our hydroponic trays are the best flats for growing your cannabis. They make monitoring your entire plant from the cola down to the roots significantly more accessible to ensure it’s healthy throughout the growth cycle.

Additionally, unlike traditional farming which needs fertile arable land and only utilizes horizontal space, our vertical grow racks maximize any space such as skyscrapers and warehouses in any climate.

Another significant benefit of installing our mobile vertical grow system is the exponential increase in income you’ll enjoy.

From saving money on transport and operation costs—including labor and water—you’ll be raking in some serious cash from now exponentially improved cannabis harvest.

At MMI Agriculture, we provide mobile vertical farming solutions guaranteed to double or even triple your cannabis yield.

Maximize Your Cannabis Yield With MMI Agriculture Vertical Growing Solutions

Ready to take your cannabis farming system to the next level? Contact us. At MMI Agriculture, we provide mobile vertical farming solutions guaranteed to double or even triple your cannabis yield.

For home growers, we offer tabletop caster units. Bonafide commercial cannabis growers looking for fully integrated solutions can benefit from our mobile carriages or vertical grow racks

No matter your vertical farming solution needs, we have a line of products guaranteed to stand the test of time and ensure a significant return on investment.

Wherever you are in America, our installation crew is available to ensure all your systems are properly installed and running correctly.

That’s not all. Our 10-year warranty covers both the equipment and labor you get from us.

Microgrids; Resolving the Indoor Vertical Farming Energy Nightmare

Indoor vertical farming has numerous advantages including better-tasting food & low carbon print. However, there's energy demand issue.

Microgrids; Champion of the Indoor Vertical Farming Pesky Energy Problem

Energy requirements in indoor vertical farming take up a whopping 60% of the farm’s operating costs.

Why then invest in indoor vertical farming? Well, there’s an increasing population with projections indicating a major increase in urban centers.

Vertical farming enables cultivation in urban centers by utilizing warehouses, skyscrapers, and shipping containers. Hence utilizing any indoor space and growing more by cultivating vertically, utilizing both horizontal and vertical grow space.

Indoor vertical farming has numerous advantages including fresh, better-tasting food and a low carbon print. However, there’s the energy demand issue.

A typical vertical farm may consume up to 38.8 kWh per kg of the harvested crop. This can add up to 5 kg C02 for every kg of the finished product.

Can indoor vertical farming be sustainable with such high figures? This is where microgrids come into play. A microgrid helps you take control over the energy you generate among other functions that we shall get to discuss.

Indoor vertical farming is an agricultural solution geared at meeting the food needs of the present. It's also an innovation aimed at solving the projected problem of population growth in urban centers. 

Sustainability in Indoor Vertical Farming

Sustainability in agriculture aims at having the present society meet its food needs without affecting the future generation’s ability to meet its own needs.

Indoor vertical farming is an agricultural solution geared at meeting the food needs of the present. It’s also an innovation aimed at solving the projected problem of population growth in urban centers. 

Some of the sustainability initiatives achieved through vertical farming include

  • Low water use by employing the use of hydroponics and aeroponics farming methods
  • Reduced use of fertilizers hence less pollution of water sources
  • Increased use of land per square foot by growing vertically.
  • All-year growth of crops since its independent of outside weather conditions
  • Reduced transportation hence reduced carbon footprint by bringing produce closer to the consumer

These are some of the accolades that award vertical farming golden stars in enhanced sustainability.

However, indoor vertical farming relies on Controlled environment agriculture technology (CEA), which entails installing power-consuming environment conditioning equipment.

These equipment include HVACS, irrigation and fertigation systems, CO2 burners, and lighting equipment. 

All these systems rely on electricity and depending on the size of the operation can have your farm consume anywhere from 500 kW to 15 MW of power. Energy needs that exceed or are equivalent to running data centers or a retail box store.

Indoor vertical farming can't do away with this equipment as they are the essence of the farming method.

The Microgrids Solution to the Indoor Vertical Farming Energy Demands

Indoor vertical farming can’t do away with this equipment as they are the essence of the farming method. Moreover, power outages can really hamper yields and quality of produce resulting in losses. 

Microgrids are a solution making headway into indoor agriculture to sustain its reputation as a sustainable method of agriculture and also as a buffer from potential losses from inconsistencies such as power outages or fluctuations.

What Are Microgrids in Indoor Vertical Farming?

A microgrid is a self-sufficient energy system operating independently of the main grid, allowing you to generate and use your own electricity for your indoor vertical farm.

Microgrids combine various forms of electricity production such as wind and solar energy and combined with intelligent software solutions and battery systems provide your farm with the energy requirements necessary.

With microgrids being independent of the mains you can have an uninterrupted power supply for your indoor farm which is crucial for an efficient grow op.

Advantages of Microgrids

  • Save on peak demand charges.
  • Consistent power supply even with power outages.
  • Lowered carbon footprint on indoor vertical farming. Microgrids utilize various green power production technologies like solar, fuel cells, wind, combined heat and power (CHP) plants, and batteries.  
  • They improve the operation and stability of the regional electric grid
  • Provide a new revenue stream through ancillary service programs.

Disadvantages of Microgrids

  • The system is costly.
  • The system is technical. This creates a demand for experts who aren’t in plenty, with microgrids being a relatively new concept.
  • High maintenance costs and space requirements as you require battery tanks to store energy.

For microgrids to run independently there are quite a handful of mechanisms that need to be regulated. Some of the complexities include

Upcoming Solutions to Enhance Microgrids for Efficient Indoor Vertical Farming

For microgrids to run independently there are quite a handful of mechanisms that need to be regulated. Some of the complexities include

  • For microgrids to function properly, the aggregate system’s voltage, power, and flow must be controlled.
  • Microgrids require a connection interface to the utility network that functions primarily as a circuit breaker.
  • Microgrid islanding. This attribute is what gives the microgrid its independence from the main grid. However, at the start of Microgrid Islanding, power flows must be balanced through energy absorption and injection capability.
  • Regulating the sudden phase voltages and currents at the point of coupling

All these are functions that need to be automated to kick in like clockwork; otherwise, any delays could result in high costs due to the system not functioning efficiently.

The grand scale of tasks needed to install and manage these systems calls for solutions to ease the workload and lower costs. 

Energy as a service (EaaS) is a solution to help indoor vertical farmers avoid huge capital expenses by having a fixed monthly rate that pays for all aspects of the microgrid system. The factors considered range from the design to the construction and maintenance of the system.

Starting an indoor vertical farm is an expensive endeavour in and of itself. Installing a microgrid raises the initial costs even more. 

EaaS technology allows you to easily track and manage your energy costs. You can also examine your operation’s efficiency, dependability, and carbon footprint.

Incorporating EaaS into your Microgrid systems brings you a step closer to achieving the sustainability goals of your indoor vertical farming operation.

When it comes to making savings on your energy costs, going vertical helps you optimize not only available space but also the output of your environment conditioning equipment.

Common Indoor Vertical Farming Equipment

When it comes to making savings on your energy costs, going vertical helps you optimize not only available space but also the output of your environment conditioning equipment.

Rather than purchasing high-grade equipment for servicing only horizontal beds. The same equipment can be used for stacked beds getting more done for the same energy used.

Don’t get me wrong: going vertical is expensive, at first. However, it provides a good ROI in the long run by producing more yields. As a result, getting your installation right the first time is the key to a successful indoor vertical farming venture.

MMI Agriculture is an experienced vertical farming installation company. We provide you with quality indoor vertical farming equipment to get you started and succeed in the industry.

Some of our indoor vertical farming equipment includes 

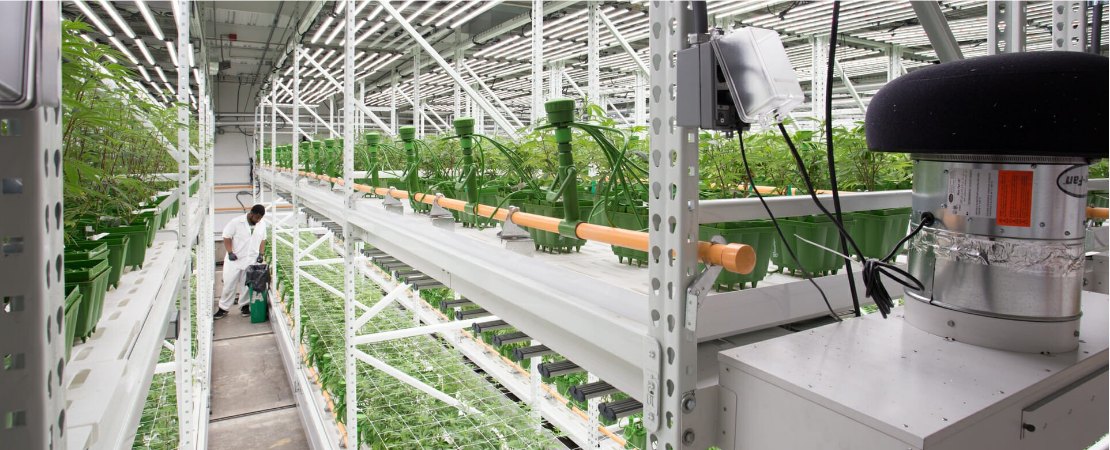
  • Vertical grow racks. Utilize your available grow space horizontally with our versatile uprights. These indoor vertical farming equipment are made of 14 gauge steel to comfortably support the weight of your crops and your workers as they tend to them.
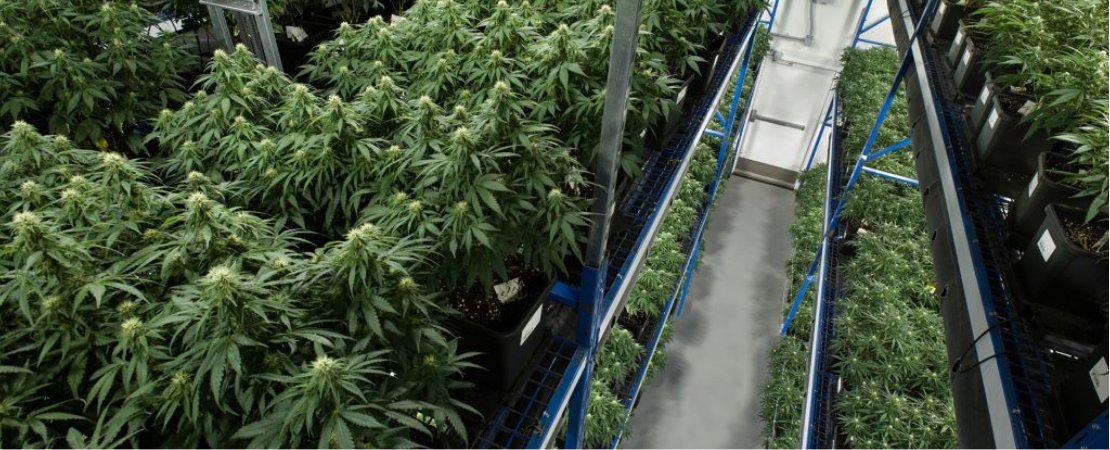
  • Mobile carriages. These are high-density vertical grow racks with mobile capabilities that allow you to eliminate wasted space in the form of static aisles. These heavy-duty vertical racks carry up to 1400 pounds allowing you to grow more in your grow space.
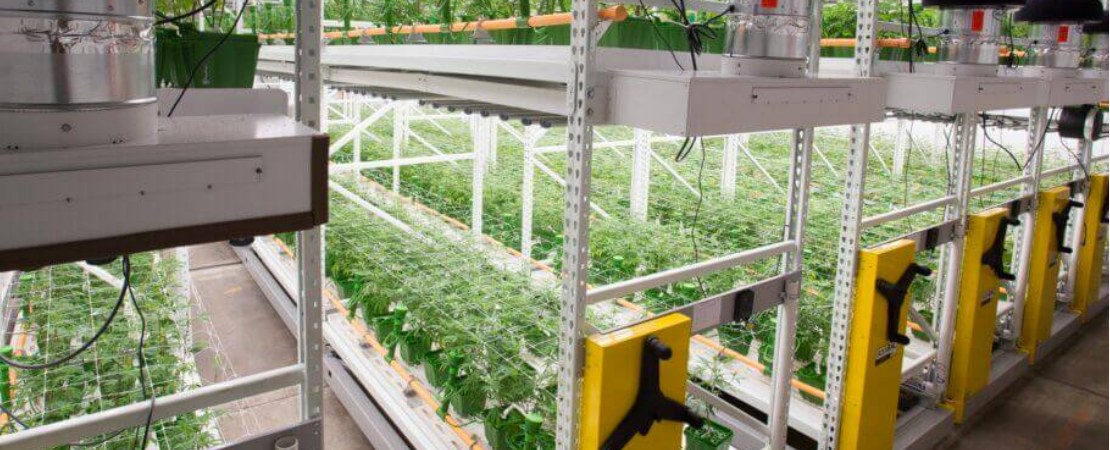
  • Tabletop caster units. Are you looking to start a midsized operation? Our tabletop caster units will get you started smoothly. The uprights are fitted with caster wheels allowing smooth transitions between rooms. Moreover, when you are content you can lock them in place and watch your crops flourish.

Indoor vertical farming has a big energy consumption problem. The cultivation method boasts of being a champion for increased sustainability in agriculture. 

Facilitate Profitable Indoor Vertical Farming With MMI Agriculture

Indoor vertical farming has a big energy consumption problem. The cultivation method boasts of being a champion for increased sustainability in agriculture. 

The energy requirements threaten its podium status. Then again, the incorporation of microgrids to provide sustainable energy for indoor farms may still sustain the cultivation method’s potential.

At MMI Agriculture we aim to provide solutions that help you successfully transition into indoor vertical farming. 

We help you get started with free floor plan drawings. Moreover, we help you do capacity evaluations, and permit acquisitions among other services to keep you on the roadmap to profitability in indoor vertical farming.

Grow Shelves for Your Commercial Operation: Benches, Tables, and Vertical Growing Systems

Having a good sense of what grow shelves are, components, & how they function should put you on the roadmap to a profitable grow operation.

Versatile and Durable: Grow Shelves Vertical Growing Systems For Cannabis Cultivation

When it comes to indoor growing, there’s a lot to consider when acquiring your cultivation equipment.

 For example, your vertical grow shelves are major equipment in your indoor grow as they host your cannabis plants, consequently taking the lion’s share of your initial investment.

Having a good sense of what grow shelves are, their components, and how they function should put you on the roadmap to a profitable grow operation.

Indoor cannabis farming is cultivating plants entirely indoors, such as in a warehouse or skyscraper within a controlled environment. 

There are two main components of indoor cannabis cultivation; vertical growing systems and controlled environment agriculture technology (CEA).

CEA allows you to provide an outdoor environment indoors. The indoor environment automates your temperature, CO2, light, humidity, and nutrients for optimal plant growth and yields.

What Is Controlled Environment Agriculture Technology(CEA)

CEA is a technology-based approach to food production.

The aim is to provide protection to plants against harsh weather, facilitating an all-year growing season. 

Moreover, it helps reduce pest and disease infection, enhance sustainability, increase yields, improve efficiency and save on costs.

CEA allows you to provide an outdoor environment indoors. The indoor environment automates your temperature, CO2, light, humidity, and nutrients for optimal plant growth and yields.

Some of the technologies used in CEA include hydroponics, aquaponics, and aeroponics. 

Hydroponics is a standard technology in indoor grow cannabis cultivation. It’s a type of horticulture that involves growing your cannabis plants on hydroponic trays using water-based mineral nutrient solutions.

The grow shelves carry your plants, lighting, ventilation, and irrigation equipment, ensuring your plants get the right conditions for growth.

What Are Cannabis Vertical Growing Systems?

Vertical farming is cultivating cannabis in vertically stacked layers, also known as grow shelves.

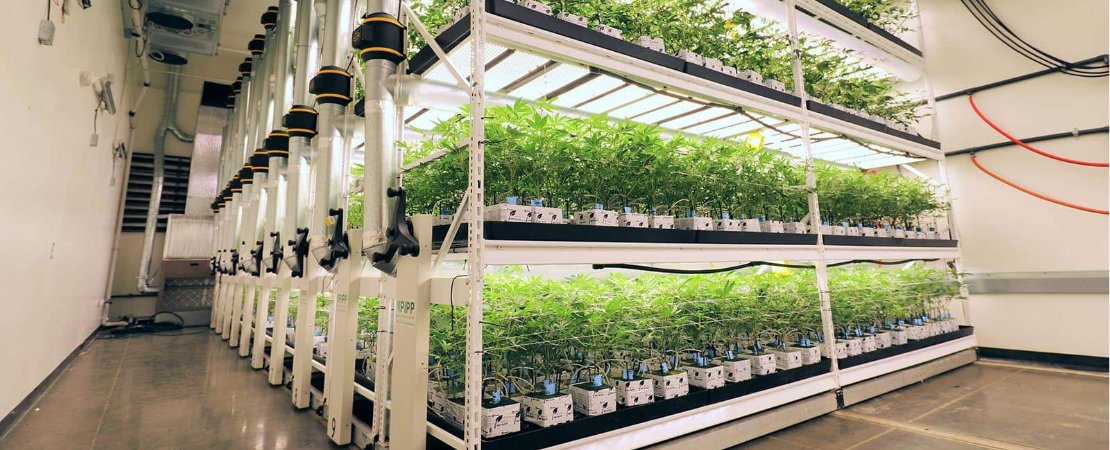
The grow shelves carry your plants, lighting, ventilation, and irrigation equipment, ensuring your plants get the right conditions for growth.

There are a variety of vertical growing systems, such as vertical grow racks, mobile carriages, and tabletop caster units.

Each vertical growing system provides unique functionalities to help optimize your grow space.

But why emphasize vertical grow systems compared to traditionally used horizontal grow beds or tables for your indoor grow space? 

Each vertical growing system provides unique functionalities to help optimize your grow space.

Benefits of Vertical Growing Systems

1. Better Use of Indoor Grow Space

Stacked grow shelves allow you to expand upwards on your indoor grow space. Therefore you can achieve higher productivity on a small land area.

Moreover, mobile carriages can eradicate static aisles, saving more space. You only need to create aisles when catering to particular grow shelves in your grow space.

2. Vertical Growing Systems Minimises Water Usage

Cultivation on grow shelves is mainly done on hydroponic trays (or hydroponics technology). This technology uses up to 90% less water than traditional methods. As a result, fewer fertilizers and nutrients are used.

The water is also easily recycled and reused, reducing waste and lowering utility costs.

3. Safe Food Production

The cannabis plants are within a closed, controlled environment, so the infestation of pests and diseases minimizes.

For example, Indica strains are susceptible to mold attack within high humidity. Controlled humidity levels ensure optimum conditions for healthy plant growth.

Minimized attack of plants leads to little or no use of chemicals and pesticides and, thus, safe, high-quality plants.

Consistent Quality and Crop Production

Vertical growing systems present you with an opportunity to grow year-round. Moreover, with controlled environmental conditions, you can grow continuously without compromising quality or flavor.

Then again, with unique light frequencies and other customized growing conditions, you can enhance the flavor of cannabis plants, increasing your profit margins.

To reap these benefits, you must acquire suitable vertical growing systems that optimize your indoor space.

Whether growing in a skyscraper, warehouse, container, or a simple home grow, there’s an ideal vertical grow system for your space.

What to Look for When Choosing Vertical Grow Systems

  1. Size of Grow Space

Whether growing in a skyscraper, warehouse, container, or a simple home grow, there’s an ideal vertical grow system for your space.

For a home-grow, tabletop caster units provide the convenience and compatibility you need for a small space. 

On the other hand, mobile carriages provide you with good space utilization and dependability for warehouse (or commercial) grow.

  1. Type of Plants

When deciding on the vertical system to purchase, you need to be conversant with the various cannabis strains.

For example, Sativas stains are a tall variety and hence can limit the number of tiers on your grow shelves. Conversely, Indicas are a short strain; hence, you may increase tiers depending on your space and plant more per square foot. It’s a similar case for hybrid strains. Each variety will provide its unique challenges.

Read more on Indica vs. Sativa vs. Hybrids on our blog for insights into their unique cultivation requirements.

  1. Lighting, Irrigation, and Ventilation Equipment

Some vertical grow racks have in-built lighting, but in most cases, they are built with provisions to install your grow lights.

Moreover, the tops of your tiers should be fitted with trays to accommodate your growing media. Be it soil, hydroponics, or aeroponics, vertical grow systems should be made to sustain your cultivation method.

Types of Vertical Growing Systems

Vertical grow racks are made similarly to shelves you see in Costco or Home Depot. They are high-density steel structures that can support heavy weights.

Vertical Grow Racks

Vertical grow racks are made similarly to shelves you see in Costco or Home Depot. They are high-density steel structures that can support heavy weights.

The same structures were rethought and made for the indoor cannabis growing industry. That is considering the plant’s height, space for lighting, and other growing equipment to ensure healthy plants.

At MMI Agriculture, we have honed in on the farmer’s needs in cultivating cannabis and designed our vertical grow racks with utility and efficiency in mind.

Some common features include

  • 14 gauge steel beams with interlocking tabs to ensure a tight fit 
  • Powder coated for rust resistance and maintaining cleanliness 
  • Provisions for installing grow lights and irrigation systems
  • 3 feet wide shelving to ensure ease of access to plants 
  • Customizable vertical space for plants to ensure proper spacing between lights and canopy 
  • Ten years warranty on parts and labor 

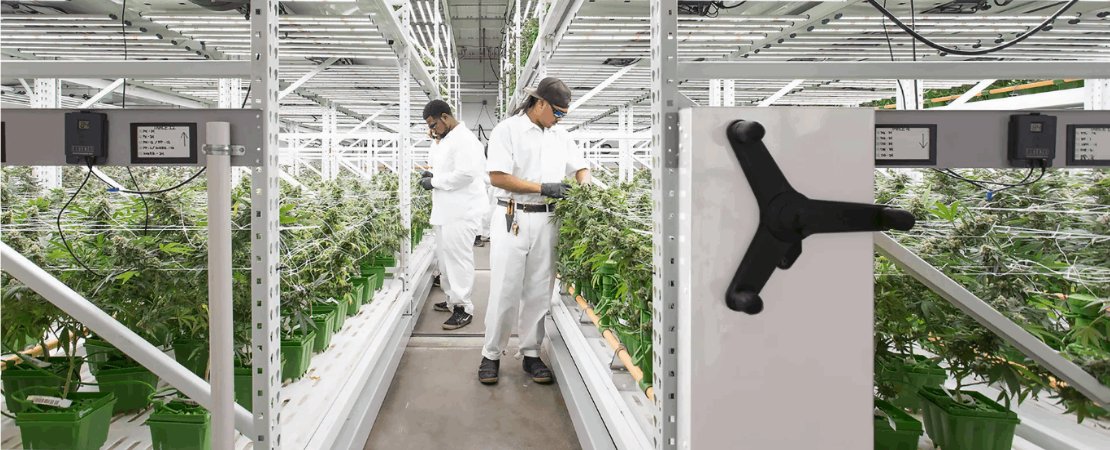
Mobile carriages are multi-tier racks you can quickly move using a handle, even when loaded with cannabis plants.

Mobile Carriages

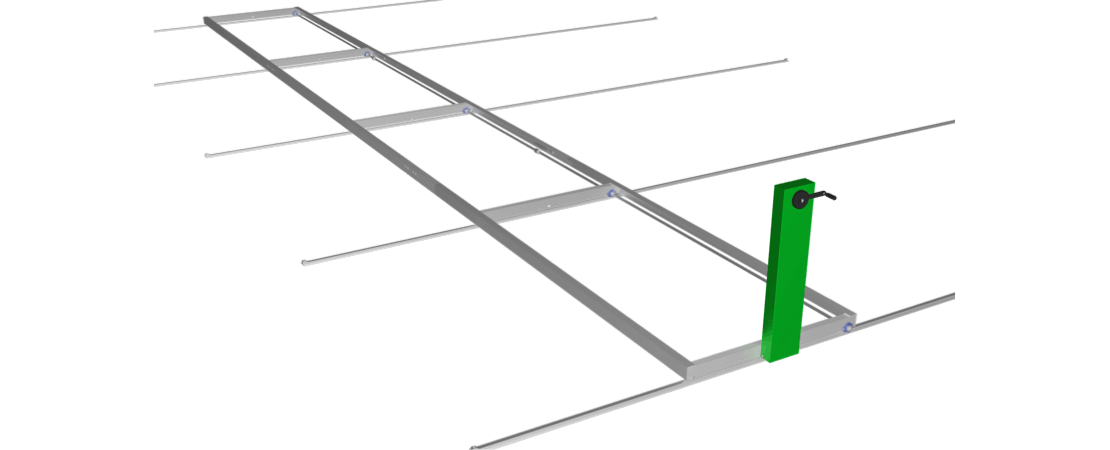
Mobile carriages are multi-tier racks you can quickly move using a handle, even when loaded with cannabis plants.

It allow you to maximize further on your grow space by eliminating static aisles. You can create aisles and tend to your plants using the handle systems.

Notably, they are expensive compared to other vertical growing systems but are well worth the investment for commercial cannabis cultivation.

Some exceptional features of our mobile carriages include:

  • Track capabilities and components 
  • Carriage capabilities and components holding up to 1400 pounds per carriage foot
  • Drives and handles capabilities that include rust-resistant drive shafts and a standard single-spoke mechanical assist handle to help you move loads seamlessly and effortlessly 

For a home grow or mid-sized cannabis grow op, tabletop caster units are the ideal vertical growing systems.

Tabletop Caster Units

For a home grow or mid-sized cannabis grow op, tabletop caster units are the ideal vertical growing systems.

These mid-sized indoor growing systems sit on caster wheels, making it easy to move between rooms. Additionally, the caster wheels are designed to swivel and lock in place.

Moreover, they are pocket-friendly systems to get you started on your indoor cannabis grow.

Moreover, for a commercial grow, the caster units are ideal for growing your seeds or clones, as you can seamlessly move them from the allocated growing sections to your vertical grow racks.

Choosing the proper grow shelves is pivotal to a successful cannabis indoor grow operation. They account for the biggest share of your initial investments, so you should ensure you get it right the first time.

Get Reliable Vertical Growing Systems With MMI Agriculture

Choosing the proper grow shelves is pivotal to a successful cannabis indoor grow operation. They account for the biggest share of your initial investments, so you should ensure you get it right the first time.

MMI Agriculture is an indoor growing systems installation company with years of experience in the industry. Our high-density uprights and personalized preliminary services, like capacity evaluations and free floor plan drawings, ensure a seamless shift into vertical farming.

We set you up and provide a 10-year warranty on our installation services and equipment, ensuring you get settled into this lucrative industry. 

So, what are you holding out for? Contact us today for a quote.

Growing Cannabis: Grow Stages, Week-by-Week Growing Guidelines

Indoor cannabis growth

Effective Indoor Cannabis Growing; The Week-by-Week Checklist

There is a way to grow cannabis year-round without worrying about planting seasons or harsh weather destroying your crops. Indoor cannabis farming is a flexible cultivation method that allows you to plant profitably throughout the year.

Indoor cannabis growing is a delicate process. However, it isn’t rocket science. It’s an achievable “science” with good attention and knowledge. 

Whether it’s a home grow or commercial grow, the plants have similar anatomy; hence, most week-by-week steps on how to grow your cannabis indoors should be standard.

Vertical cannabis growing is the cultivation of cannabis within an indoor environment on vertically stacked tiers. 

What Is Vertical Cannabis Growing?

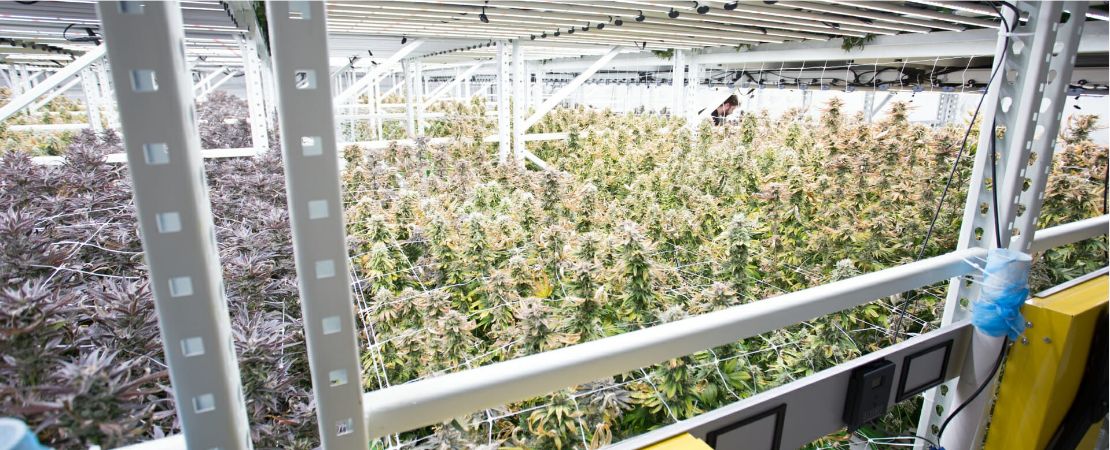
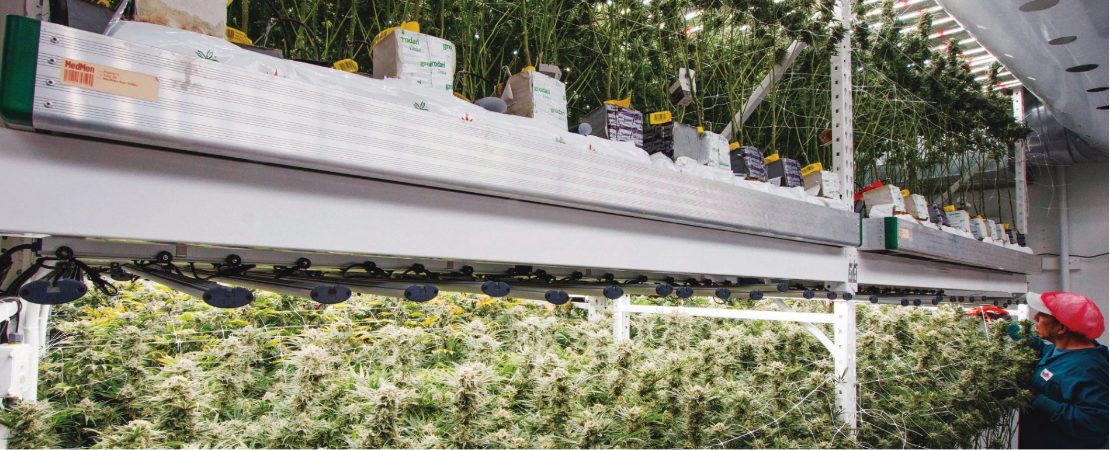
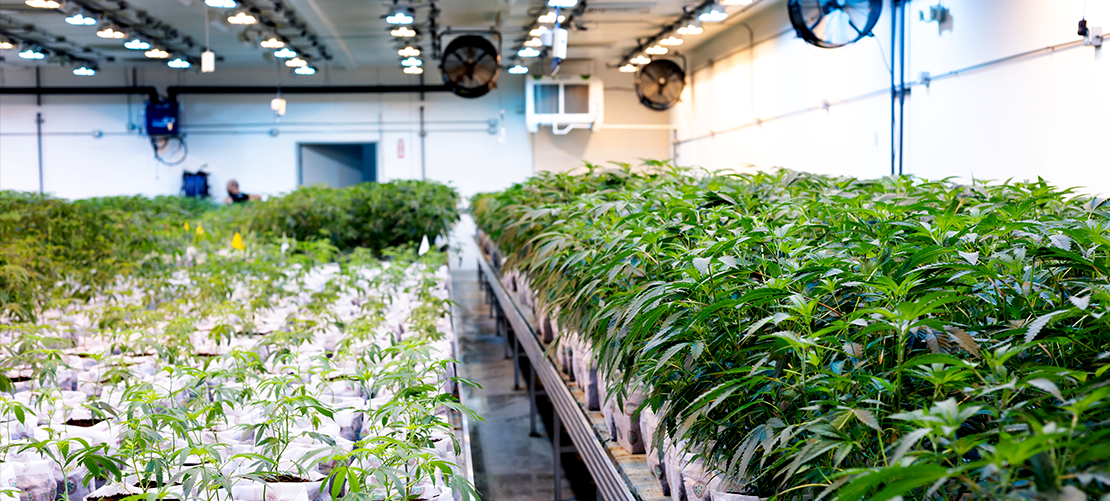
Vertical cannabis growing is the cultivation of cannabis within an indoor environment on vertically stacked tiers. 

As an indoor environment, the plants’ surroundings are created to simulate the outdoor conditions by leveraging controlled environment agriculture technology(CEA).

This necessitates the use of various equipment like 

  • Irrigation systems. They supply the plants with the water they require while draining wastewater.
  • Ventilation systems. They provide good airflow extinguishing stale, humid air and replacing it with fresh oxygen/CO2 rich air. It also prevents mold build-up.
  • Controllers/timers. These can include digital units or timers that control the various equipment like lighting and ACs to provide the resources at the required time.
  • PH meters. Suitable pH means healthy cannabis plants; thus, measuring the water pH is crucial. 
  • Thermometer and hygrometer. Cannabis plants need a particular temperature at each growth stage and moderate humidity to avoid mold build-up.
  • Vertical grow racks. These high-density growing systems help you utilize every square foot of your growing space with cannabis plants. They include mobile carriages, vertical grow racks, and tabletop caster units.
  • Fertigation systems. They provide your plants with fertilizers for healthy growth.
  • Hydroponic trays. They provide a house for your plant’s roots.

Indoor cannabis growing brings major advantages such as all-year growing regardless of weather or season, precision farming, high yields, and consistent quality of buds.

Then again, how can you profit from indoor cannabis growing? Here’s all you need to know about cultivating cannabis indoors.

Cannabis Growing Week By-Week Guide

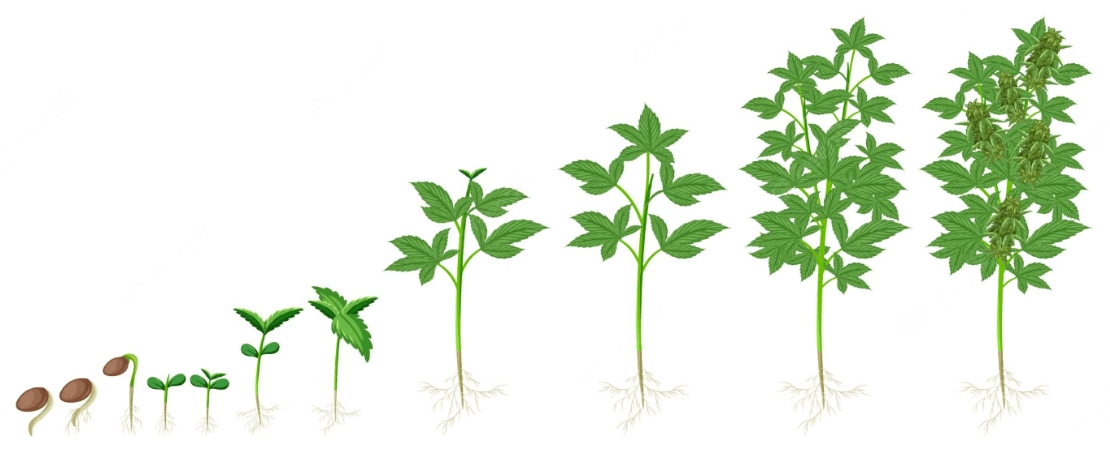
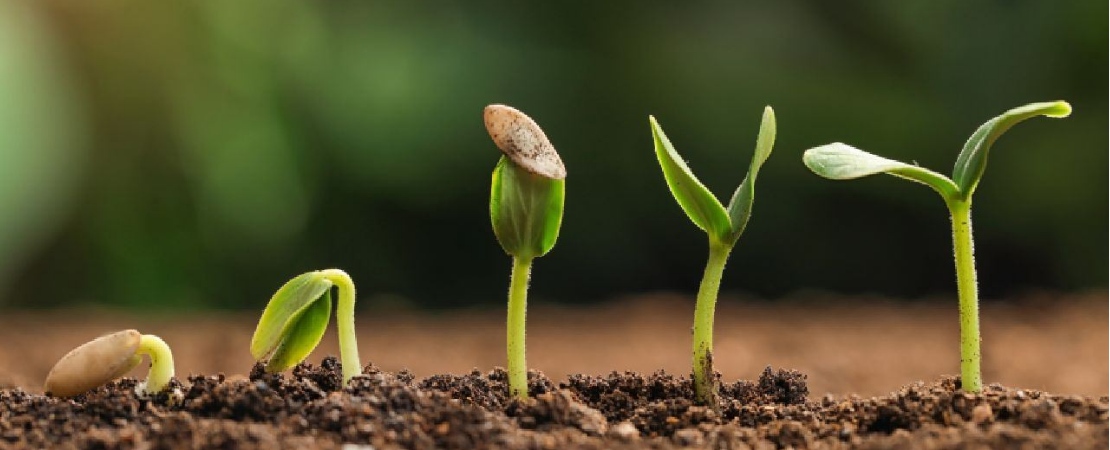
Acquire some top-grade seeds and soak them in water for not more than 24 hours, or else they’ll drown. Once soaked in the water, watch that the seeds stay submerged. Seeds determined to float within 24 hours aren't viable and should be discarded.

Seed Germination (Week 1- 2)

Acquire some top-grade seeds and soak them in water for not more than 24 hours, or else they’ll drown. Once soaked in the water, watch that the seeds stay submerged. Seeds determined to float within 24 hours aren’t viable and should be discarded.

Once the soaking time lapses, transfer them to rockwool cubes (or any other growing medium for plants). 

Be sure to provide all requirements for seed germination:

  • Warmth by having your grow lights on (for a 24hr cycle) and maintain temperatures 75F(240C) or higher.
  • Water to the base of the growing medium at a pH of about 5.8-6.1
  • Ensure complete contact between the seed and growing medium. Also, aim to have the pointed end of the seed directed downwards, as it’s the point from which the root will come out.

Notably, this is the time to start filling your growing journal, noting the progress of your plant’s growth. This is important as you can determine the nutrients needed at each growth stage, among other critical details.

The seedlings should emerge after 8 or 9 days. Please note probing around the growing medium (checking) for shoots before that time can damage the roots.

On the other hand, you can start your cannabis growing using clones extracted from healthy mother plants. Have your clones in humidity domes, and don’t water them till roots emerge.

Now that your plants are germinated into healthy shoots in your tabletop caster unit.

Vegetation Stage (Week 3-5)

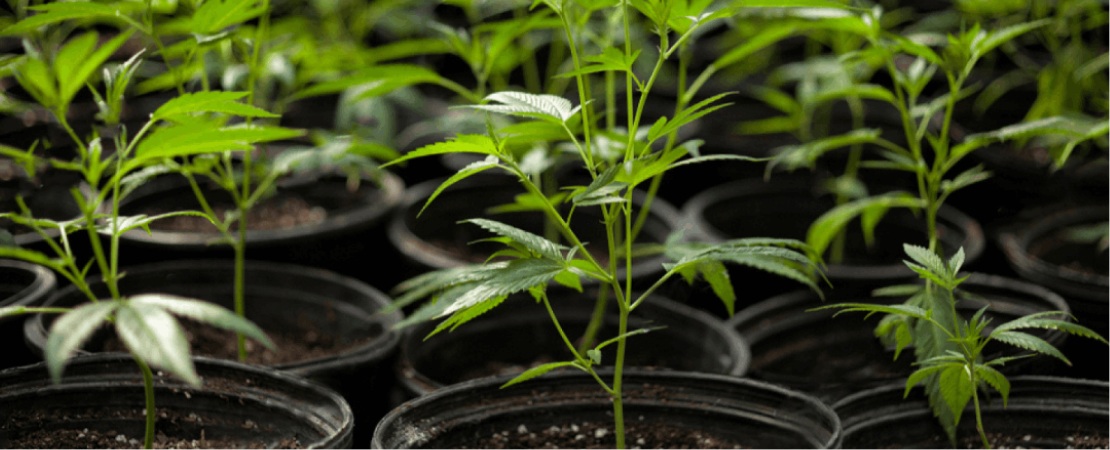
Now that your plants are germinated into healthy shoots in your tabletop caster unit. You can move them seamlessly on your caster units from the germination section/ room to your vertical grow racks for transplanting.

Put them on your 1020 or hydroponic trays to help you with good watering and drainage when necessary. Water the plants until roots form.

Also, at this point,  you should introduce intense lighting but gradually. Remember to have your LED lighting at least 8 inches above the plant top.

At this stage, you might as well keep the light on for 24 hours cycles; however, others recommend 1.5hrs of lights off within the cycle to give the plants a “rest.”

For a commercial grow, you may need to boost your CO2 levels by incorporating CO2 burners in your indoor grow room. Plants need carbon dioxide(CO2) to make food; increasing the concentration will significantly affect their growth and yields.

Moreover, maintain a temperature of 78F, humidity at 65% in weeks 3-4 and at 60% in week 5, and pH levels at 5.8-6.1.

Flowering (Week 6)

If you have customized mobile carriages, you are in luck during the flowering growth stage. 

Customized carriages are manufactured with a particular vertical space that will be important at this stage. Why? At this point, the plants are about 12” tall, and with a sizeable vertical space, you can grow them to 16”, where you can start the 12/12 flowering light cycle without worrying about grow space.

The plants double in size fast when you switch them to start flowering. Getting them started on flowering at the right time ensures they aren’t oversize and cumbersome to handle hence maintaining high-quality yields.

Gradually lower your humidity levels in the weeks of your flowering stage: weeks 6-7 at 60%, weeks 7-9 at 55%, week 10 at 50%, week 11 at 45%, and week 12 at 40%.

Also, have the temperature (78F), CO2 levels, and pH constant.

It’s important to note:

  • Keep the dark period completely dark till the lights come back on. Seal any gaps light could penetrate through and keep the room locked. Any light leaking into your grow room would slow the flowering process.
  •  If moving plants to a flowering room, maintain conditions as in the vegetating environment to avoid shocking the plants. Also, consider having the lights off for about 36 hours before starting the 12/12 cycle.

The long wait has ended, and it's time to prepare and harvest your rich cannabis buds.  

Budding/ Harvesting (Weeks 13-14)

The long wait has ended, and it’s time to prepare and harvest your rich cannabis buds.  

At week 13, the aim is to start hardening the buds. Hence it would help if you started lowering the temperatures (to 72F) while tracking the trichome’s progress. The plants may mature diversly, with some getting ready for harvest before others. 

It would be best if you lowered the humidity as well to 30%.

Similarly, the plants no longer need to make food; hence you can turn off your CO2 or lower the output for the “late bloomers.”

At week 14, keep lowering the temperature (tp 68F) and humidity (to25%). The aim is to simulate fall weather.

You can determine if the plants are ready for harvest using two methods;

  • Pistil Method. Observe the pistil and ensure ⅔ of it has turned to an orange color.
  • Trichome Method. Using a strong magnifying lens, observe the trichomes. They should gradually change from a cloudy appearance to amber in color.

When harvesting, delicately handle the plants as you trim the precious buds. 

Avoid damaging the trichomes, as this may reduce the potency of the buds. 

The damage is characterized by feeling some stickiness as you handle them.

Finally, dry and cure your trimmed buds and store them properly.

The week-by-week guide is to bring you accustomed to all that pertains to indoor cannabis growing and should not be a replacement for a professional, especially for a commercial cannabis grow. 

Do Your Indoor Cannabis Growing With MMI Agriculture Vertical Systems

The week-by-week guide is to bring you accustomed to all that pertains to indoor cannabis growing and should not be a replacement for a professional, especially for a commercial cannabis grow. 

Moreover, remember to have a growing journal throughout the process, as this ensures you have a guide that works with your equipment and overall grow space.

At MMI Agriculture, we help individuals and companies acquire quality vertical growing equipment for their cannabis grow ops. 

We provide and install our premier products, such as vertical grow racks, mobile carriages, and tabletop caster units

With our experience and durable equipment, you should have a smooth start or transition into vertical cannabis growing. Contact us today for a quote.